How to remove the background from your images in Canva
If you’ve been following us for a little while, you’ll know that we love using Canva to create all kinds of designs that we use day-to-day in our business, anything from Instagram reels and posts, to Youtube intros, and even some of our Squarespace Templates graphic elements.
Canva is a real power-house for small businesses and DIY-ers, and we’ve been loving all the new features they’ve been releasing recently. One of those has been the Background Remover, an incredible tool that, you guessed it, can remove the background from just about any image!
Gone are the days of tedious and time consuming highlighting, erasing, and Photoshoping. In literally one click, Canva’s newest tool spits out a near perfect background-less graphic 95% of the time!
And if it’s not 100% perfect on the first go, its easy eraser tool will help you make any tweaks so that you can streamline your design to perfection in just a few extra seconds.
Ready to become a background remover pro? Let’s dive in and save you hours off your next design projects 👇

When should you use the Background Remover tool?
Have you ever found that one perfect photogenic photo of you? Your face says I’m a professional boss babe, your hair slays, and you’re glowing (probably because you were on holiday), but the sunny beach or your favourite crowded brunch spot in the background tells a slightly different story 😅
Well, what if you could change the narrative? By removing busy or irrelevant backgrounds, you’re left with endless design possibilities to let your subject really shine!
Background-less images are ideal to create fun and professional graphics that you can use anywhere, including your socials, your website, or your resume.

How to use the Background Remover tool?
First things first, you will need a Canva Pro account to use this tool. Don’t worry, you can test it out with a 30 day free trial first!
Step 1: Create your design
Open up your Canva account, and search for a template you like or click Create a Design in the top right corner. Pick a media type from the dropdown or choose a custom size. It’s up to you!

Step 2: Upload your image
Just drag and drop your image into your new design document and it will automatically be added to your Uploads folder.
Tip: Did you know Canva has a full built-in library of stock photos that you can use! Just head over to the Elements folder in the sidebar and scroll down until you hit Photos.

Step 3: Edit your image
Select your image and click Edit Image in the top left.

Then select Background Remover under Tools.

Step 4: Watch Canva do its magic
Voila! A couple of seconds later, Canva will give you back your image background-free ✨

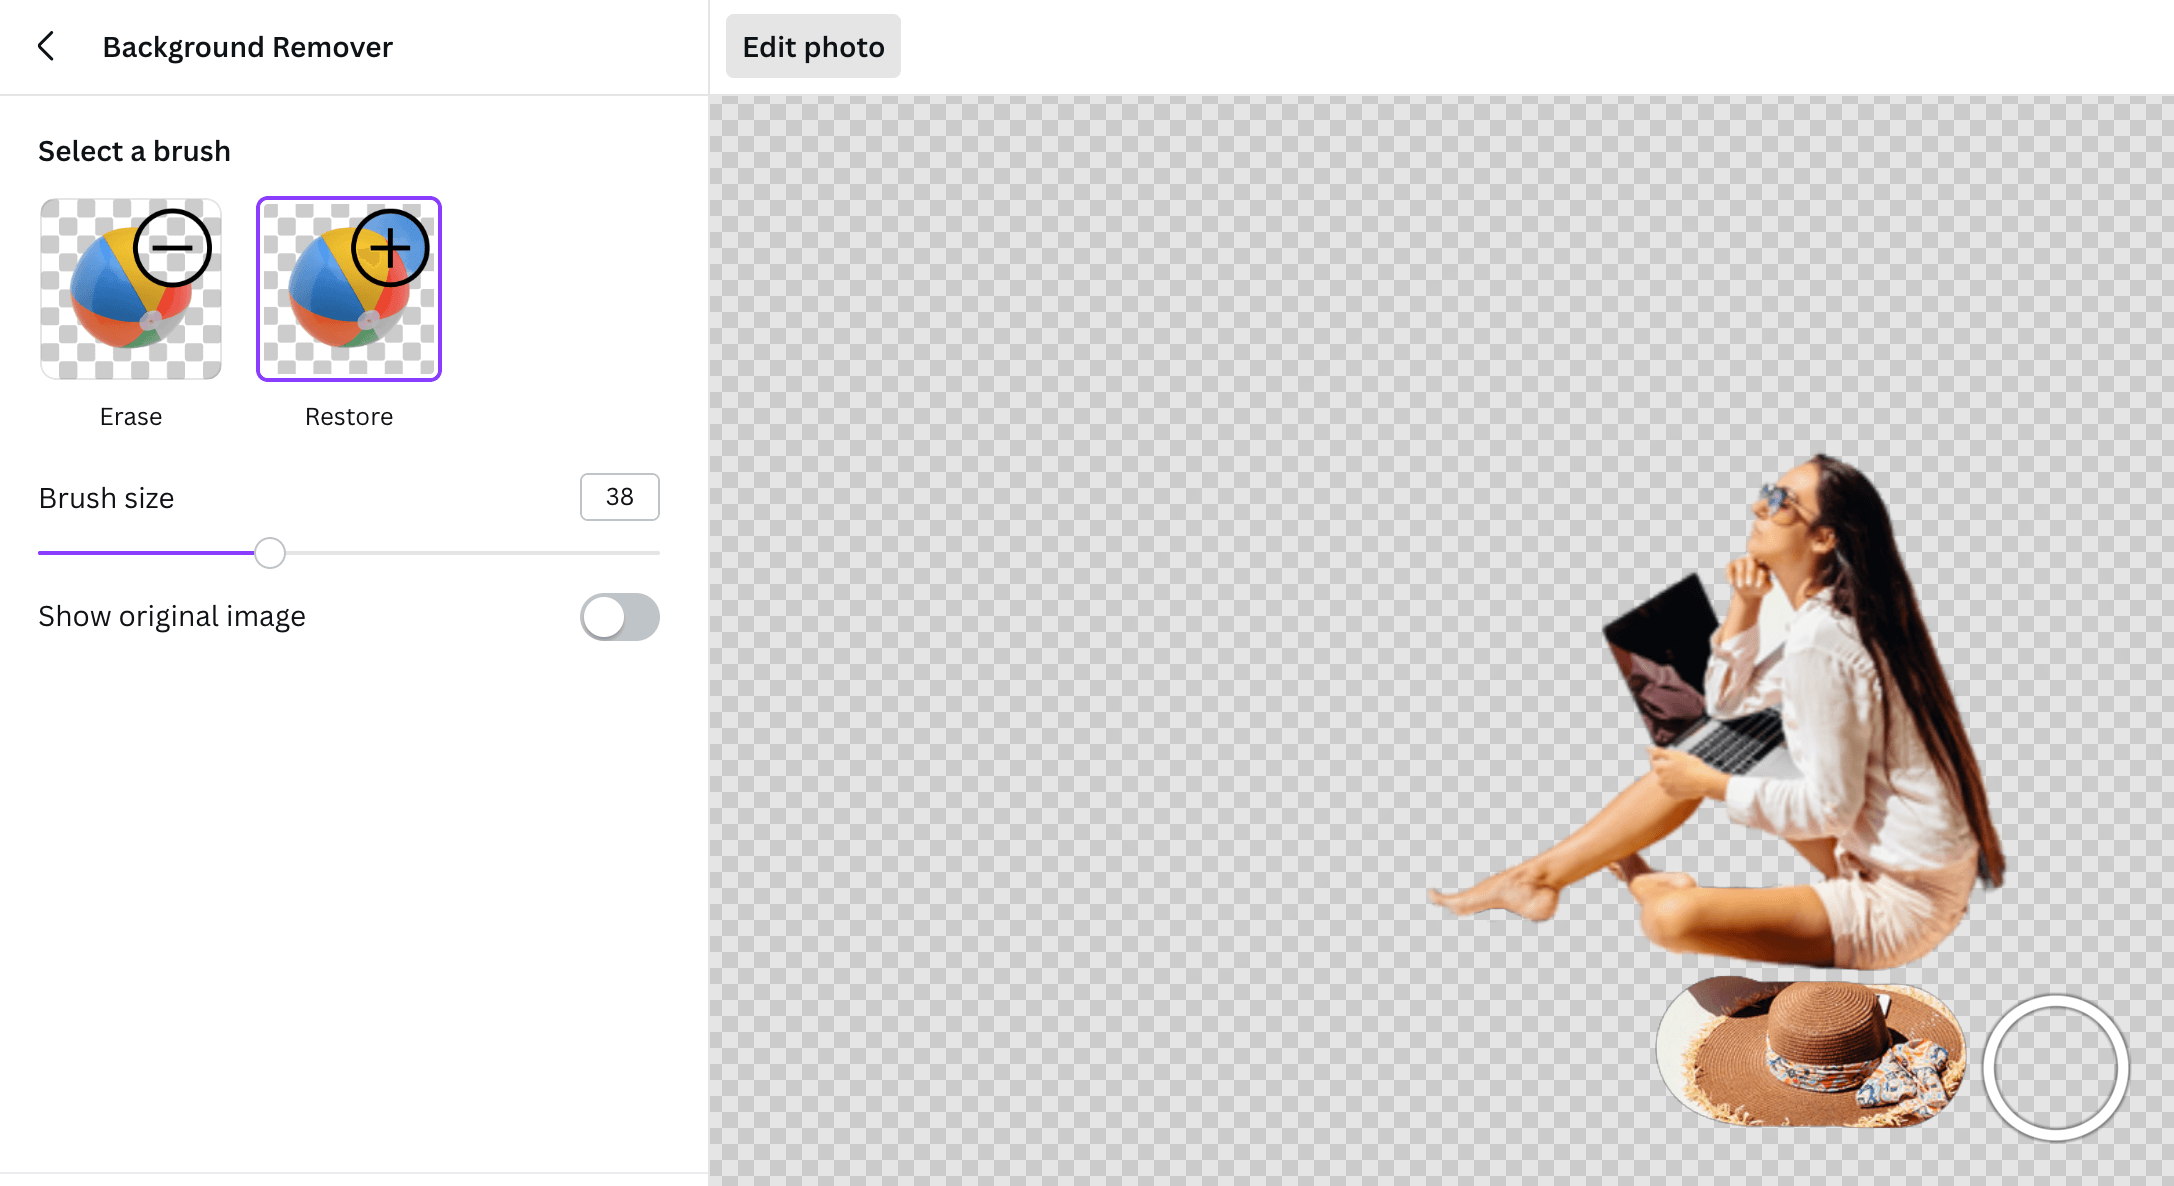
Step 5: Adjust your image
If you're not 100% happy with what Canva has generated for you, click on the Adjustment symbol in the centre of the Background Remover tool.

This will give you access to erasing and restoring options.

Adjust the brush size and use Erase to further clean up your image or remove any extra elements (like the hat).

Or use the Restore tool to bring back any elements that you would still like to showcase and keep as part of your graphic.
Step 6: Happy designing!
Once you're happy with your edits, go back to your design document and the sky's the limit!!
Add fun graphic elements or a totally different background, resize your image, add some text, and have fun with it!

Want more Canva tips? Check out these posts:
How to create an animated intro for your Youtube videos in Canva (easy!)
How to create a scrolling computer mockup in Canva (easy!)
How to create GIF stickers for Instagram in Canva and Photoshop
How to create circle text in Canva
How to design kick-ass Pinterest graphics that are optimized to get clicks
If you liked this post, Pin it to Pinterest! 👇🏻