How to Host a Podcast on Squarespace
Hosting a Podcast is currently the IT thing to be doing. Everyone from business owners to influencers to educators is taking advantage of the medium to share their thoughts and expertise. It’s a fun and convenient way to give your audience free content and it’s easy to get started, so, we get the hype!
Now, you might be thinking, “There’s no way it’s that easy” or “I won’t be successful until I’m on Apple Podcasts”. And that’s fair! If podcasting is something you want to take seriously, then it will take a lot of work and you should definitely aim high. However, those massive platforms aren’t necessarily beginner friendly and can sometimes make things harder (even for the really popular shows).
Our point is that there are actually ways to host a Podcast that won’t stress you out or have you worrying about being treated like the low man on the totem pole. And yes, it really can be that easy to get started. Enter Squarespace!
Not only does Squarespace make it crazy simple to host your own Podcast, but it provides the assurance that you’ll always have a reliable version safe and sound on your website that your listeners can access directly. Something you can’t necessarily control with platforms like Apple Podcasts.
Truly, if you have a Squarespace website, hosting a Podcast couldn’t be easier.
Let us show you how!

Why Should You Start a Podcast?
Still need a bit more convincing to get your microphone out? Don’t worry, we’ve got you!
Like we said before, all types of people from all different genres and industries are gravitating toward Podcasts as their go-to form of content creation these days. But, other than pure entertainment, why should you actually start a Podcast? How is hosting a Podcast going to benefit you and take your business to the next level?
Here are some things to consider:
Popularity: In this case, you might want to follow the crowd, because if a ton of people are making Podcasts, that means a ton of people are listening to Podcasts. Podcasts are easy to follow along with while doing mundane things like driving or cleaning and don’t require a ton of focus or brain power like reading a blog post might which makes them so easily consumable. The masses are telling us that they love a good Podcast, so you’ve got to get your hat in the ring!
Increased Traffic All Around: Hosting a Podcast on your Squarespace site is going to provide yet another piece of content that can be optimized for SEO and found in search results. And the more opportunities you have to be found on Google, the better. Plus, once you start to expand and place your Podcast on other hosting platforms (Apple, Spotify, etc.) you’ll then be added to their search results. At the end of the day, all of this is going to result in more traffic to your website or social channels and more success for your brand.
Low Cost, High Reward: As far as marketing strategies and business tools go, Podcasting is extremely cheap (at least at first). You can, essentially, start a podcast with one microphone and a subscription to a recording software. That’s it! Plug in, hit record and start to reap all of the benefits. Once you get a bit bigger, you might consider spending extra on higher tech equipment, an editor, or video additions, but none of that is required to get started.
Expertise with Personality: If you’re trying to educate people on a specific topic or provide valuable information to your audience, it can be tricky to get your point across in writing while still remaining interesting and desirable. You don’t want to bore people to death before they even have a chance to get on board with what you’re offering! Speaking out loud can be a much easier way to share your expertise while also showing who you are as a person, and Podcasts provide the opportunity to use your personality to grow an audience. Whether you are funny, dramatic, conversational, or a mix of everything, show it off! Make your area of expertise entertaining, exciting, and irresistible to listeners.
Okay, now that you’re confident that starting a Podcast is the right choice, let’s get into how it’s done in Squarespace.
How to Host Your Podcast on Squarespace
If you already use Squarespace, you could do this directly within your existing website OR you might decide to create a new Squarespace site solely for the purpose of hosting your Podcast. Either way, your new Podcast is only a few super easy steps away!
It all comes down to using the Blog feature in Squarespace and adding Audio Blocks to your Blog Posts.
Every Squarespace site comes with a built-in ability to add blogs (like this one you’re reading now!). You can have as many Blogs as you want, and within each Blog you can have as many Blog Posts as you want.
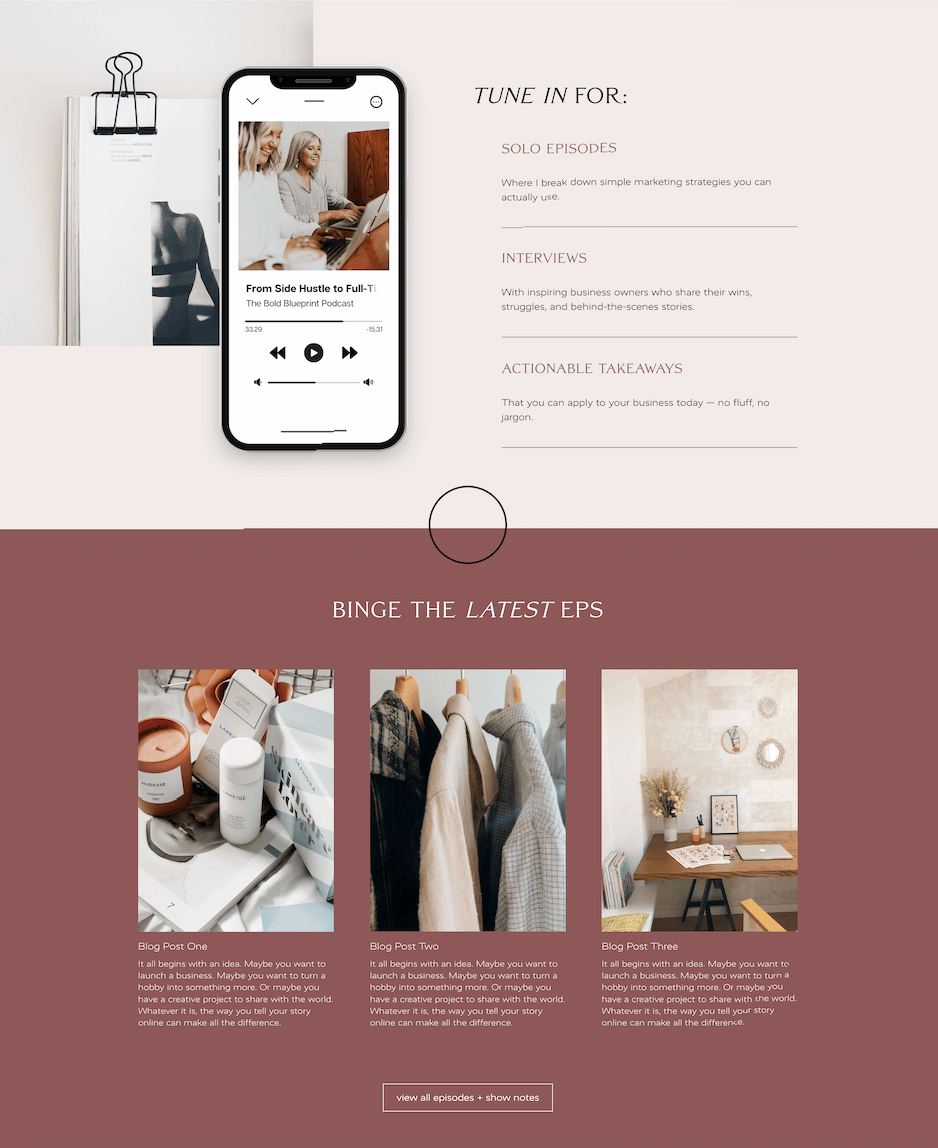
We recommend only having one main Blog and then separating your different posts (or Podcast episodes) by adding “Categories” to them. And if you find it intimidating to have to create a whole entire Podcast page, you might want to consider utilizing one of our Podcast Add-On Pages!
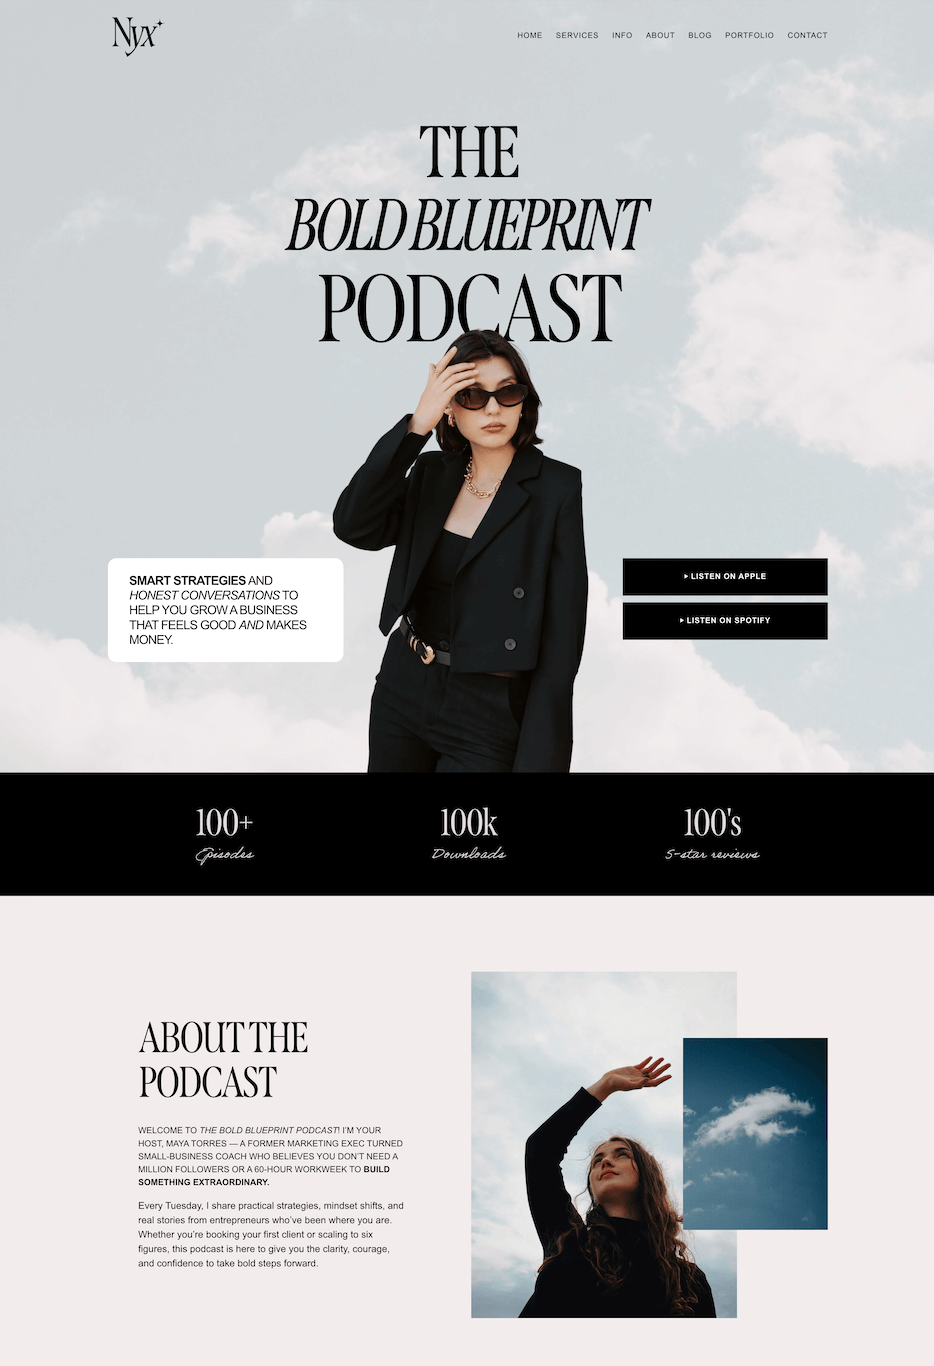
Our Podcast Add-On Pages were designed specifically with the intention of highlighting your Podcast and the individual episodes you share. You’ll find beautiful and functional layouts that are easy to navigate and will keep your audience listening for hours. You can purchase a Podcast Add-On Page as a bundle with your Template or individually which means you can start your Podcast at any time and still have a gorgeous landing page to match your site.
Alright, now let’s dive into the step by step for hosting your Podcast on Squarespace.
Step One: Add Your Blog
If you already have a Blog on your website, you can simply add your Podcast episodes to that existing Blog and then add a “Podcast” category to your new Podcast Blog Posts to keep them organized.
Or, you can create a completely new Blog just for your Podcast. Whatever you think will work best for you!
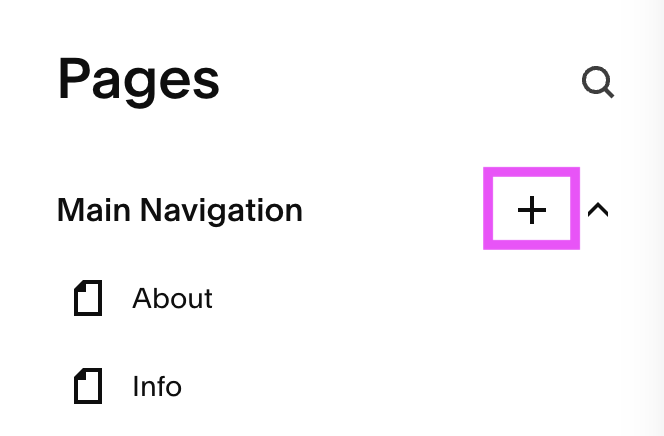
To add a new Blog, navigate to your Pages Panel and click the “+” icon in either your Main Navigation or Not Linked section (depending on where you want your Podcast to appear).
Then, choose Blog from the pop-up list of pages.
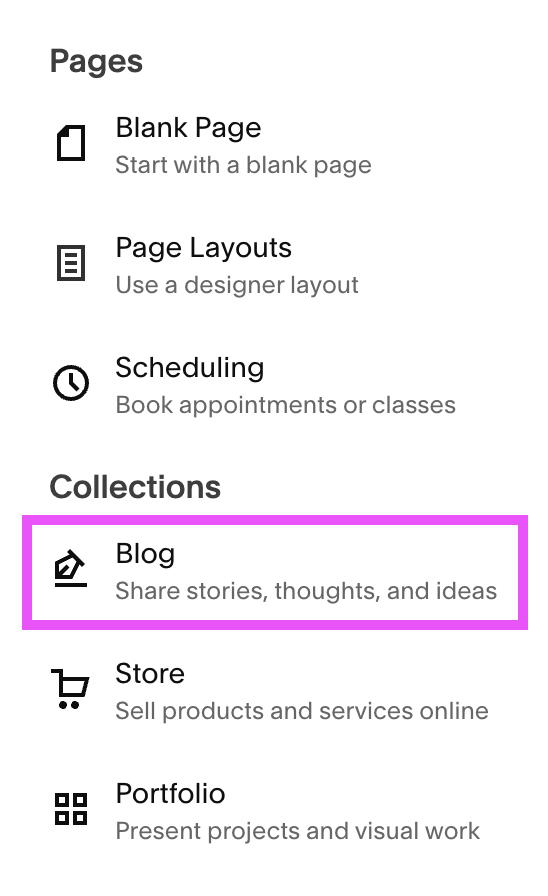
You’ll be able to choose a layout for your Blog (don’t worry, you can change this anytime!) and then give your Blog a name. Since we’re creating a Podcast landing page, you’ll probably want to name this something like “Podcast” or whatever the name of your Podcast might be.
Step Two: Add a Post
Now it’s time to add a new post, and this will be the page where you actually host your Podcast Episode.
To add a new post, click on your new Podcast Blog to enter the Blogging Panel. From here, you can click on the “+” icon next to where it says “Blog Content”.
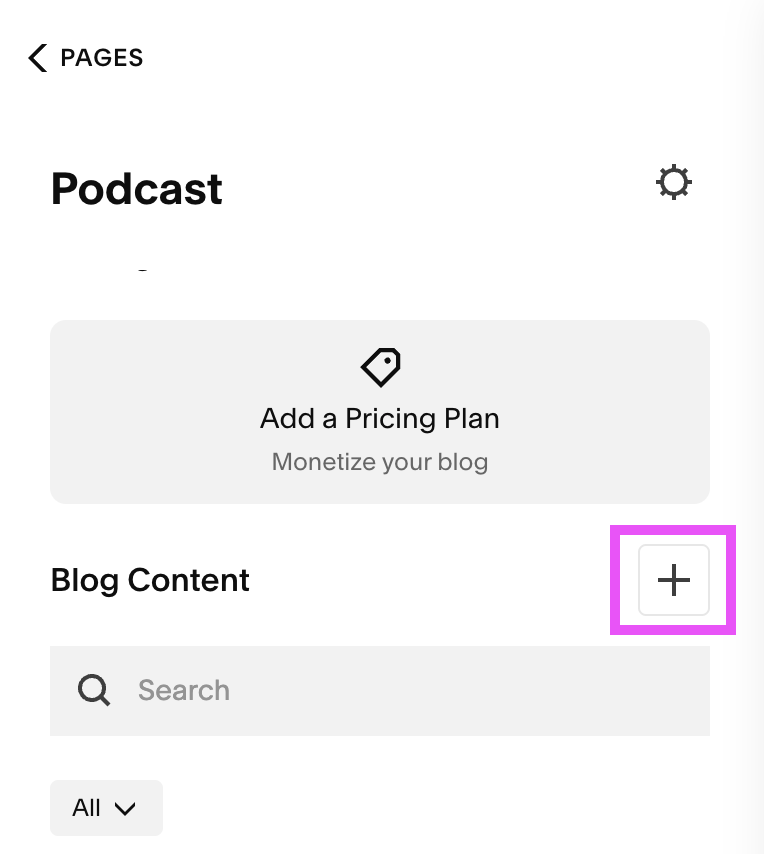
Note: Squarespace will provide you with a few demo Blog Posts. You can either use these as a template or just delete them if you don’t need them!
Step Three: Customize your Post & Settings
If you’ve blogged with Squarespace before, then you’ll be familiar with the way things work. And if you haven’t, don’t worry, it’s pretty self explanatory and intuitive so you’ll be able to catch on quickly.
👉 Read our full post on how to Start a Blog with Squarespace
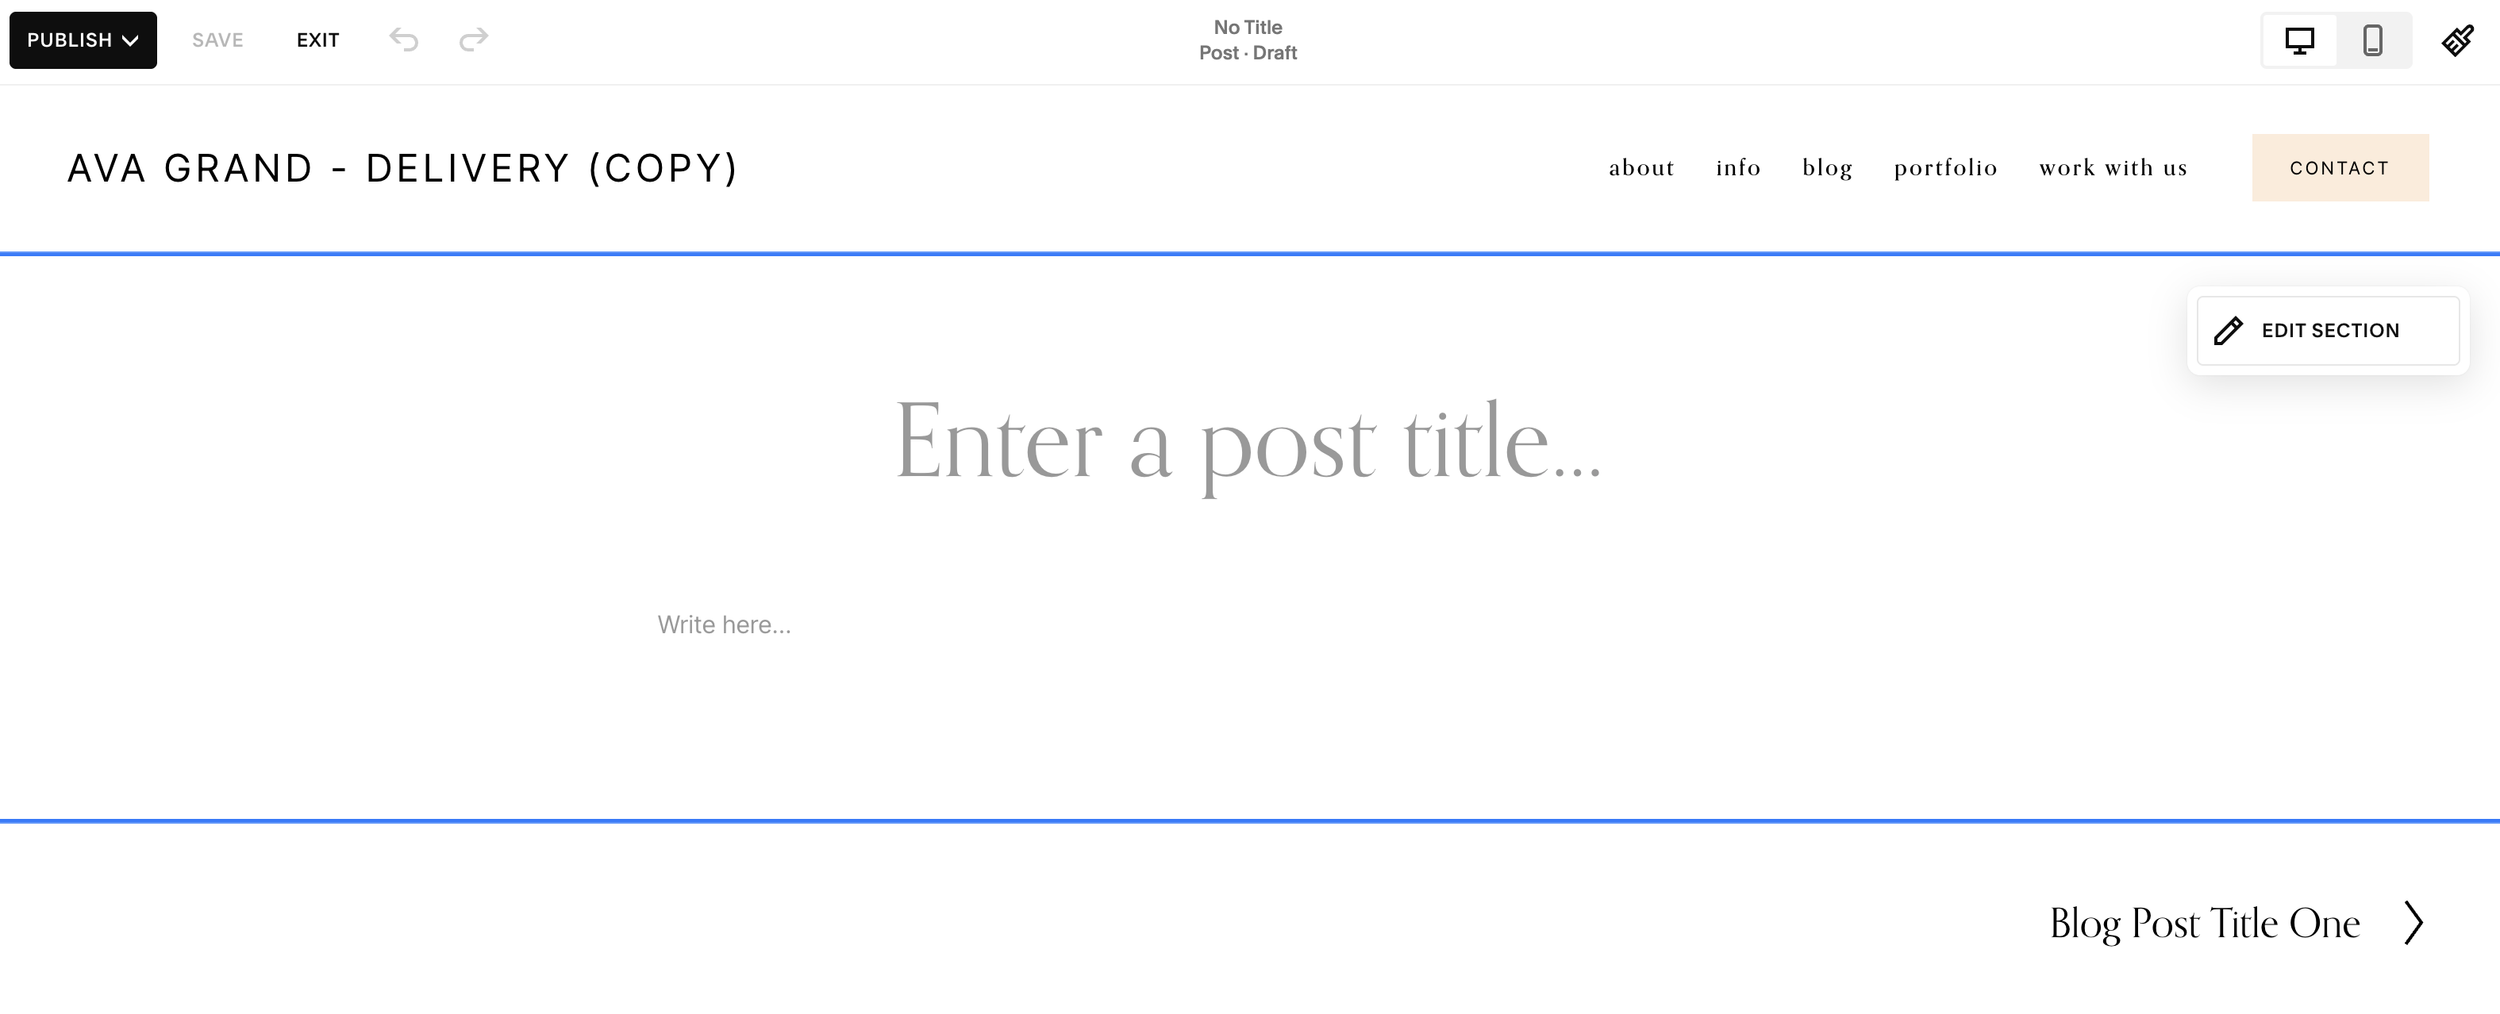
When you first add a new Blog Post, the Squarespace editor will automatically open up and you’ll be able to add your Podcast Episode Title and any additional content. This is where you can add any text you want to include for each Podcast Episode like a transcription, synopsis of the episode, or any extras and/or resources that you might touch on in the Episode.
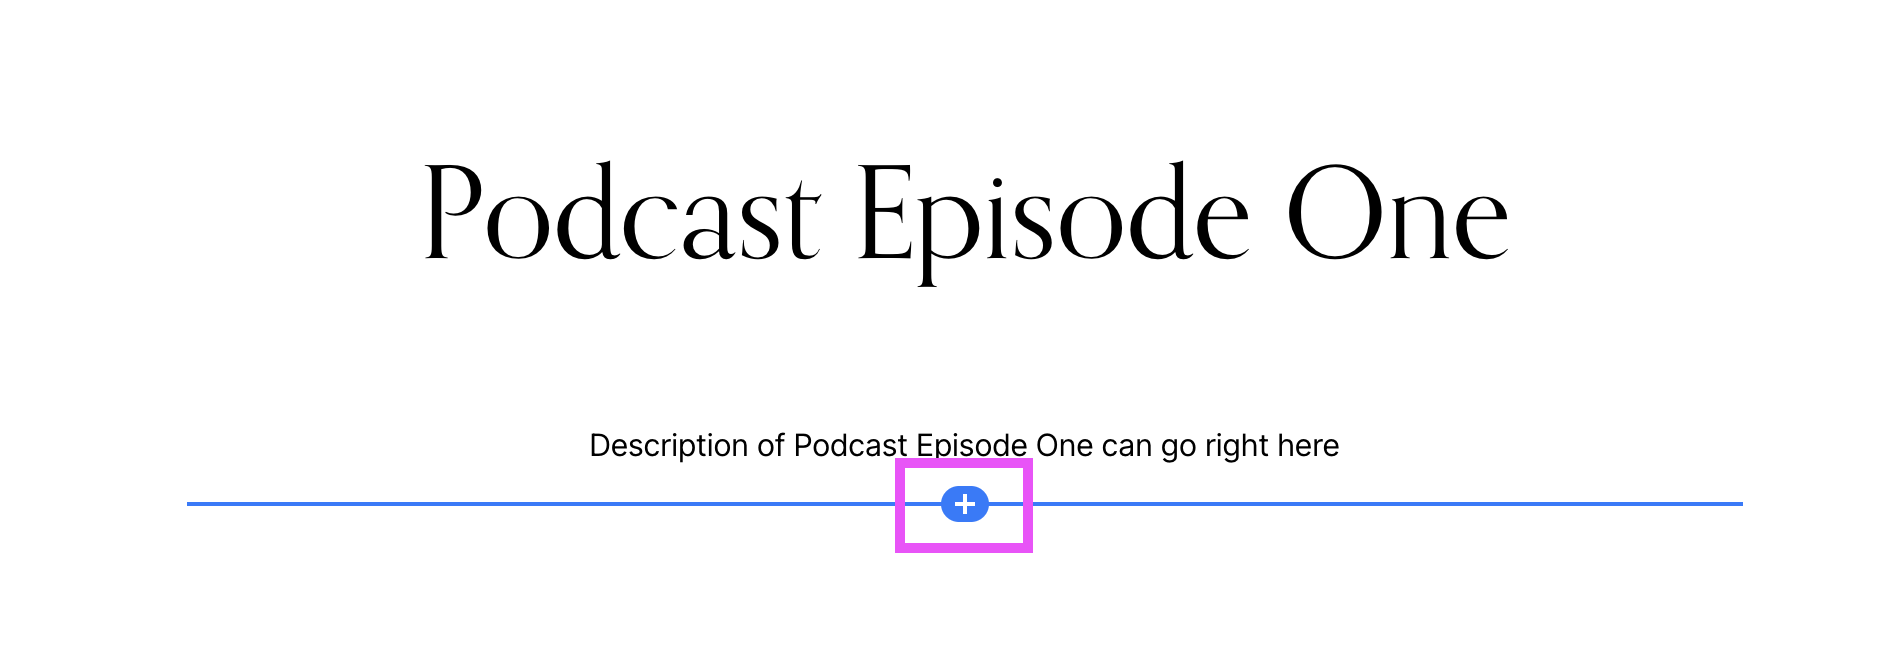
Be sure to leave a space for your Podcast Audio, which we’ll go over adding in just a moment!
To view the Settings for your post, exit out of editing mode by first clicking on Save and then Exit in the top left corner. Choosing Save will allow your post to remain as a draft until you’re ready to publish so that you can keep tweaking and editing.

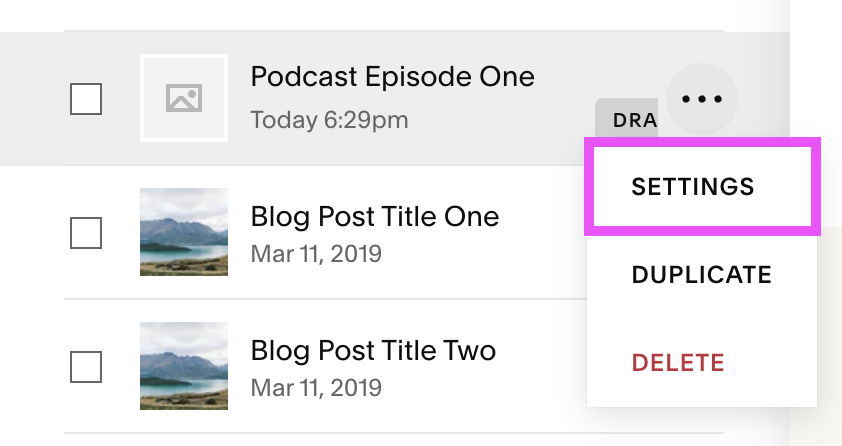
In the Blogging Panel, hover over your new Podcast Post, click the 3 dots and then click Settings.
In the Settings Window, you’ll be able to customize a bunch of different things. Here’s what we think is most important under the Content tab:
Featured Image: This is the thumbnail image that will appear on your main Blog landing page and anywhere else you add your posts around your site, so it should be something intentional that pairs well with your Podcast Episode.
Excerpt: This will display underneath the thumbnail image on your main Blog landing page if you allow it. It will also display as a description when your post is shared to socials, so it’s really great for encouraging people to click.
Post URL: Squarespace will generate a URL for you using the Title of the Blog Post, but we always recommend creating your own. This is especially important for when you have a really long Episode Title or a Title that might be confusing at first glance. Keep your URLs short and simple!

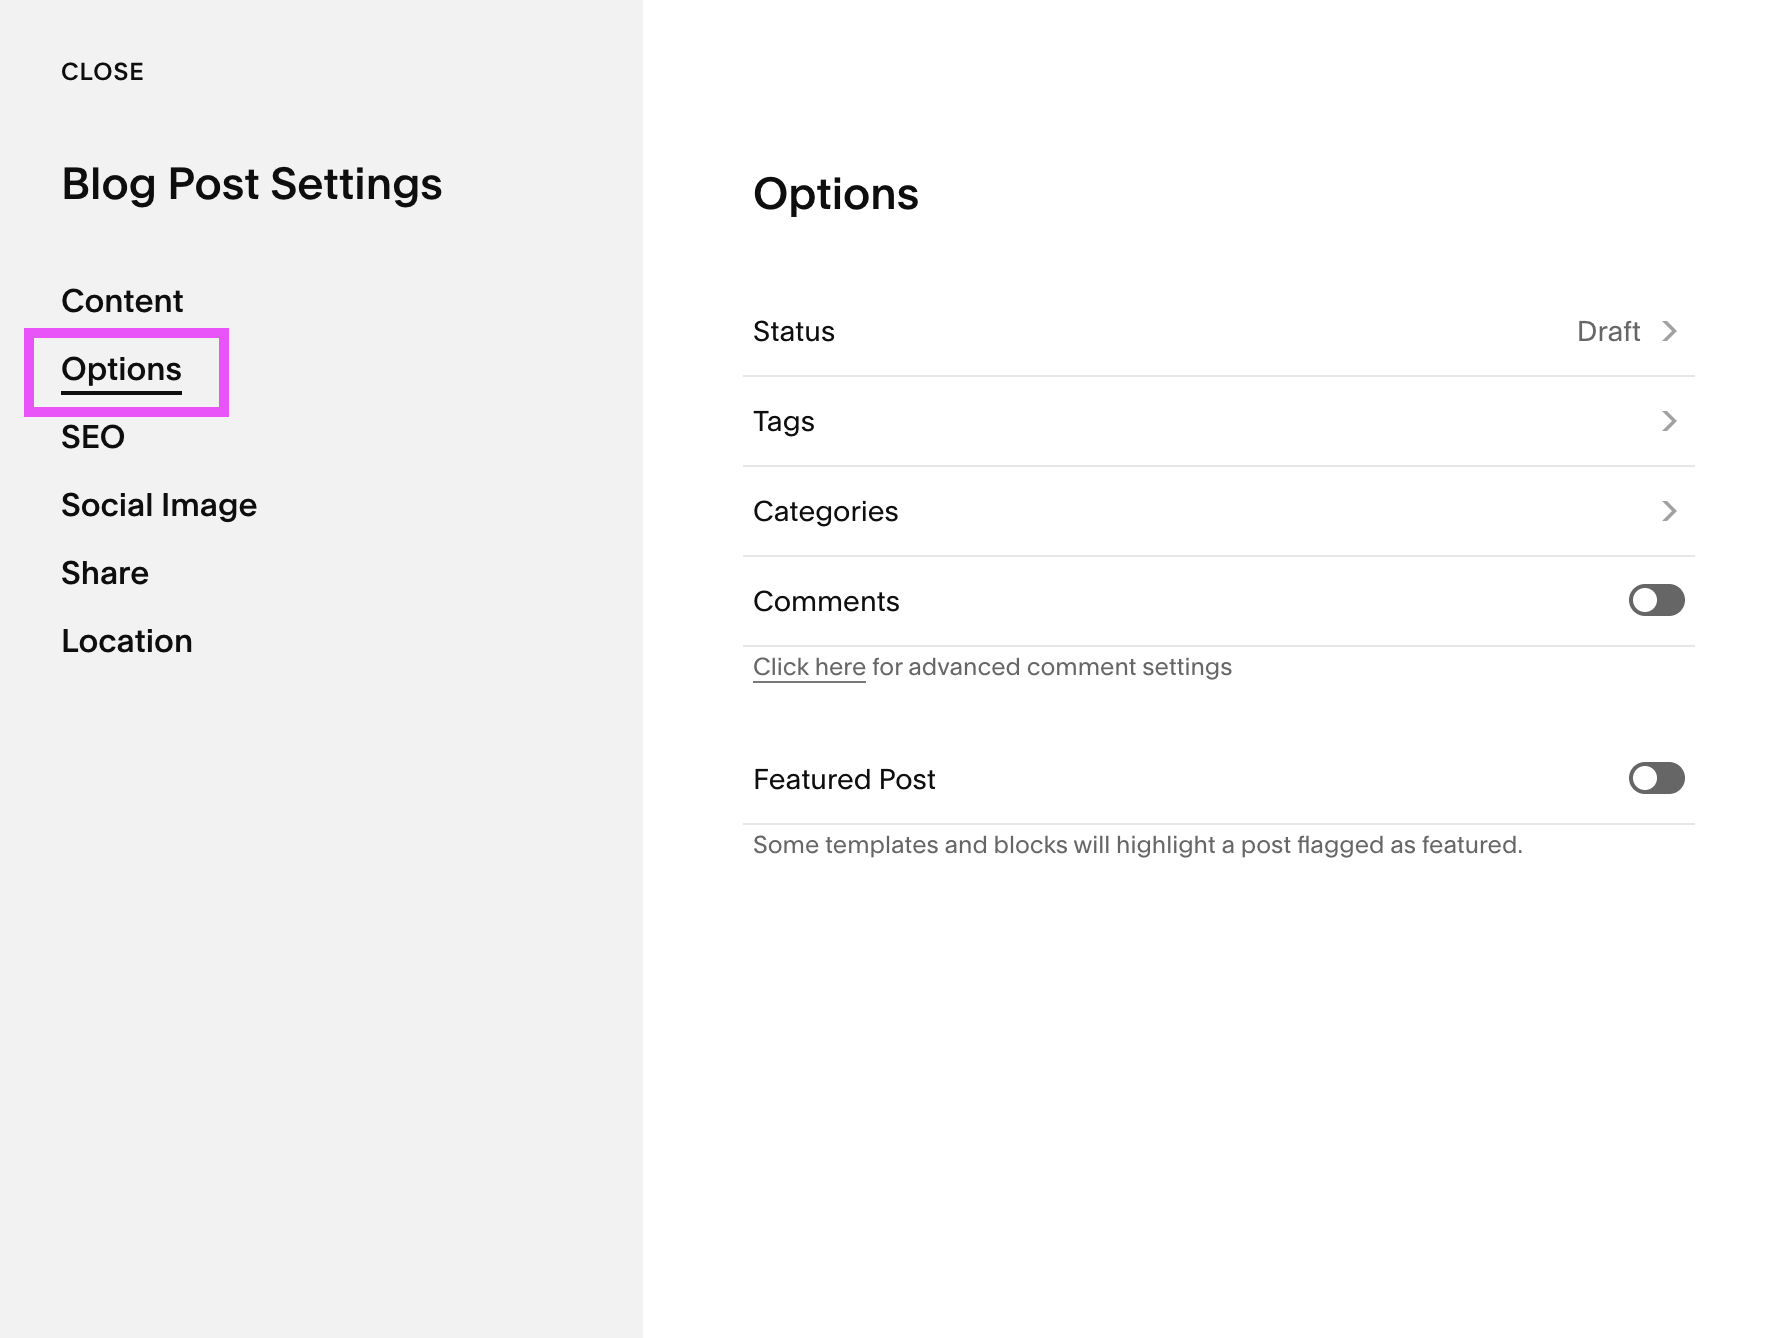
Here’s what’s most important under the Options tab:
Status: Here you can change the public status of your post, schedule it for a later date, or even mark it for review if you have a team that reviews your content.
Tags & Categories: Add any necessary Tags and/or Categories. We definitely recommend adding Categories to organize your Podcast Episodes into topics that will be easily searchable for your audience.
Comments: You can turn comments on or off for each post.
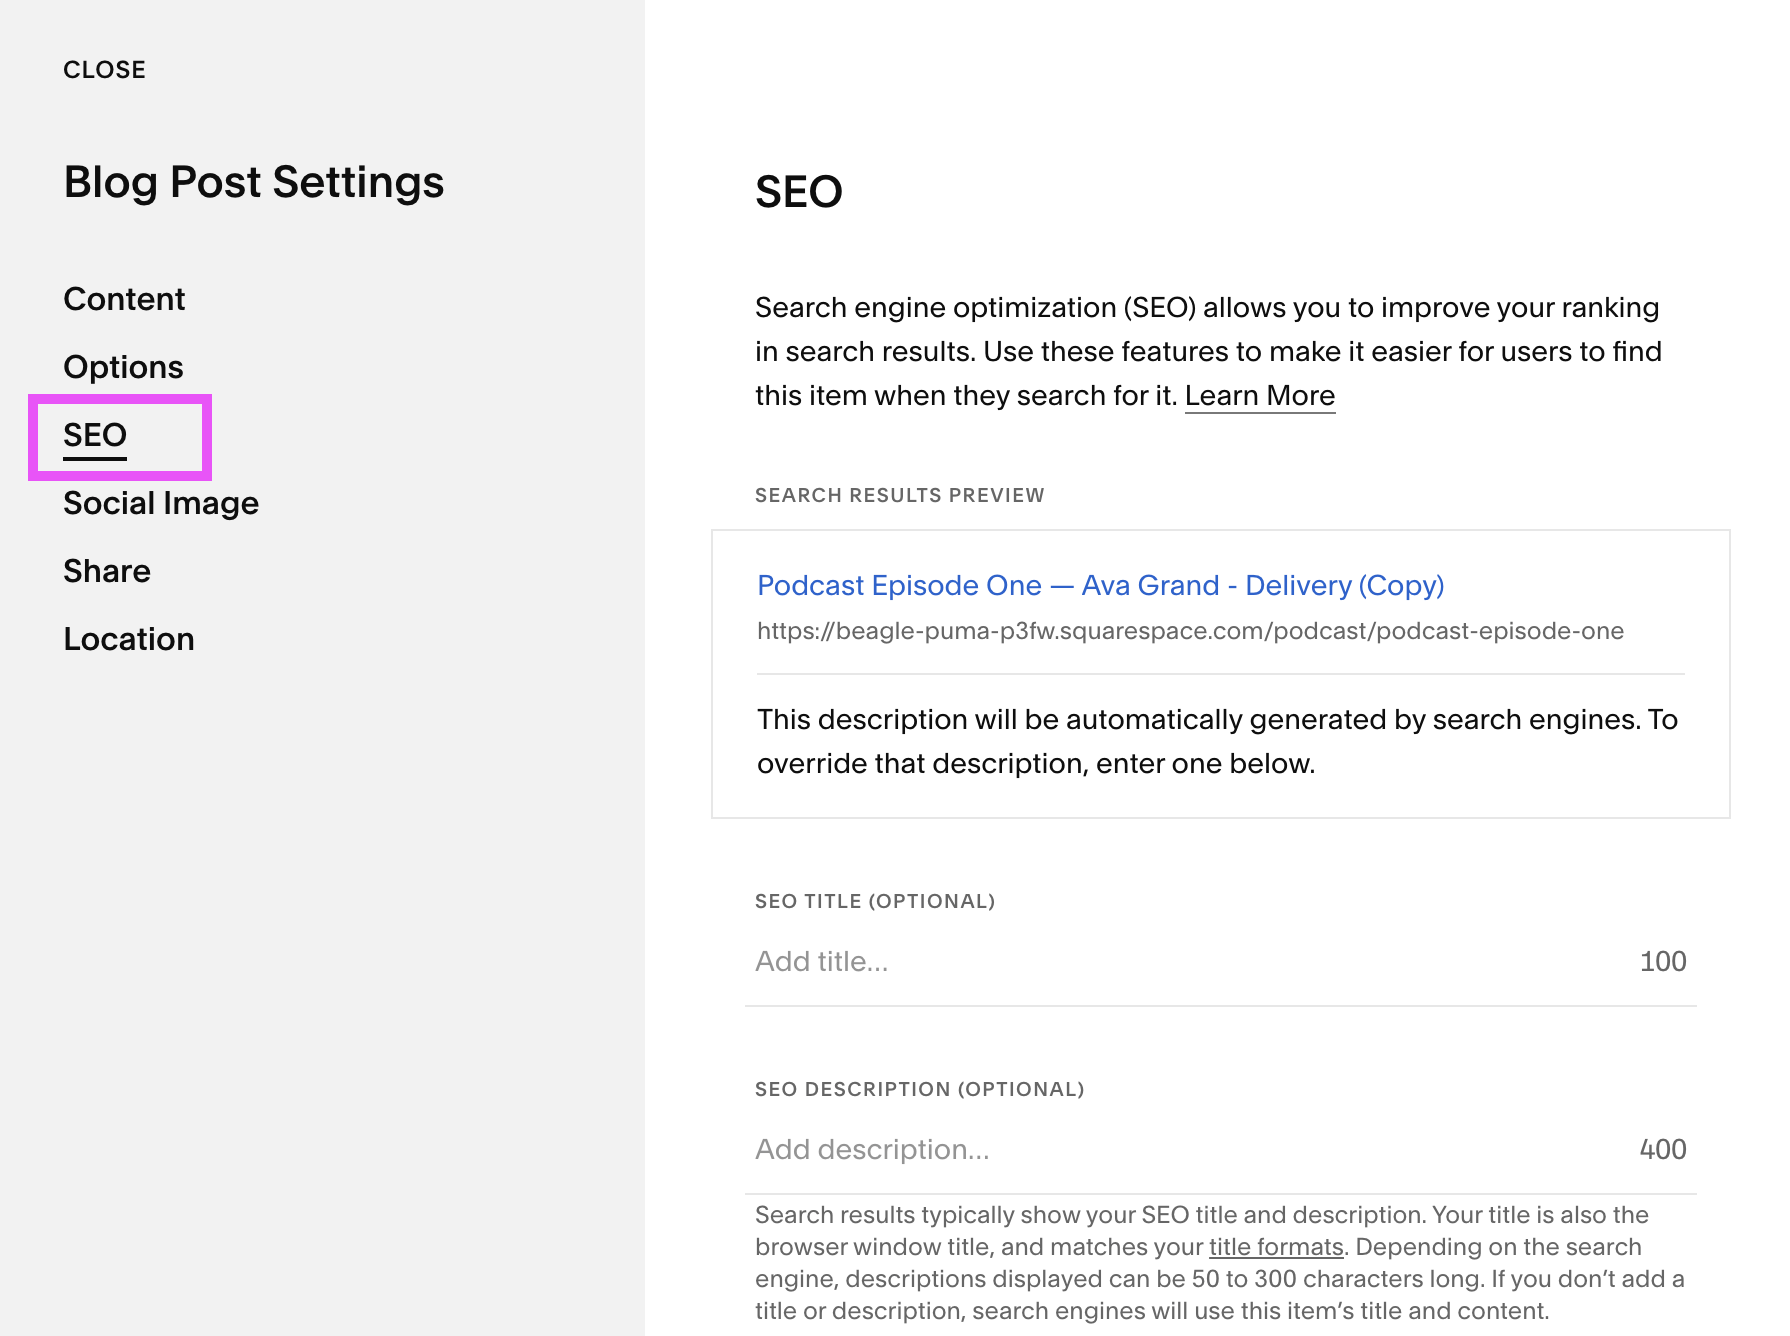
Here’s what’s most important under the SEO tab:
SEO Title: If you’d like you can give your post a unique SEO Title. If you leave this blank, the Title will simply be the Title of your Podcast Episode
SEO Description: It’s important to add an SEO Description for each Podcast Episode so that people who come across you on Google know what to expect. Without a description, potential listeners won’t be able to tell whether or not they’ll enjoy the Episode!
We also recommend taking a look at the remaining Social and Location settings to see if there’s anything you’d like to adjust here, however these features aren’t as important.
Step Four: Add Your Audio File
Now that all that boring maintenance is taken care of, we’re going to take your post from being a basic Blog Post to being a bonafide Podcast Episode!
Head back into editing mode of your Podcast Blog Post by clicking on it in the Blogging Panel and then clicking on Edit in the top left corner.
Hover over the area where you want to add your audio and click on the blue “+” icon.
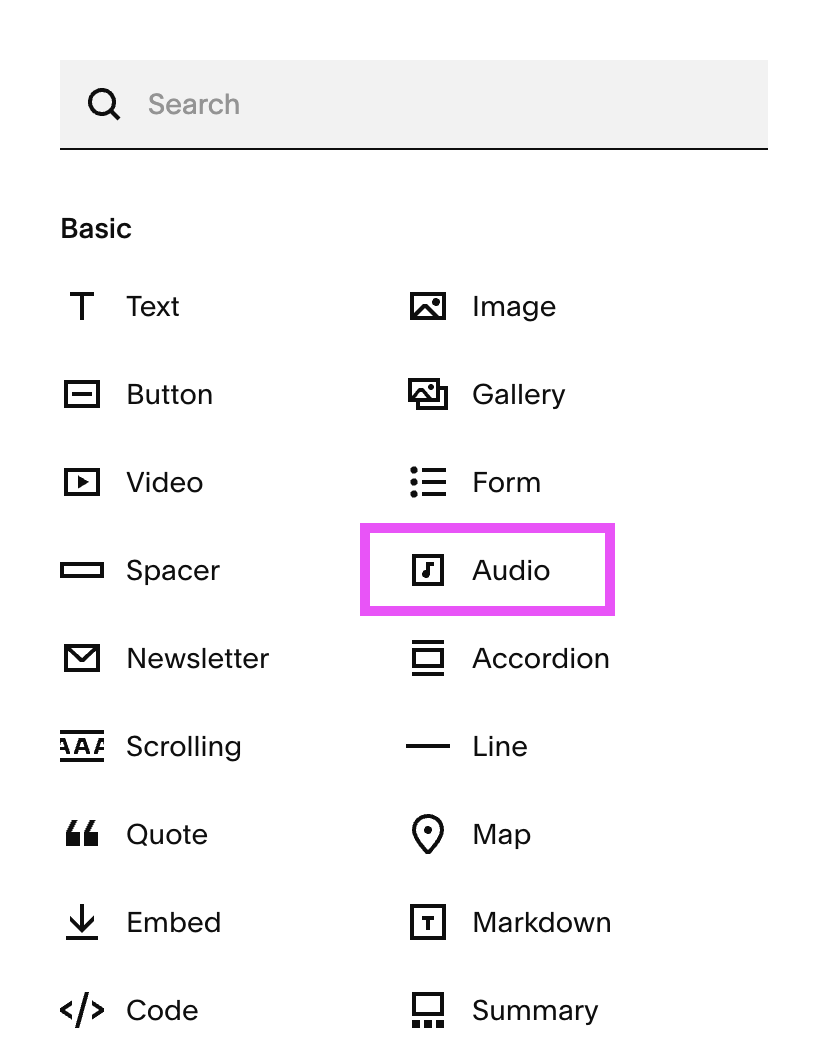
In the pop-up window, choose the Audio Block.
Step Five: Customize the Settings for your Audio Block
You’re almost finished! All that’s left to do is actually upload your audio file and customize your audio settings. Let’s go through each tab.
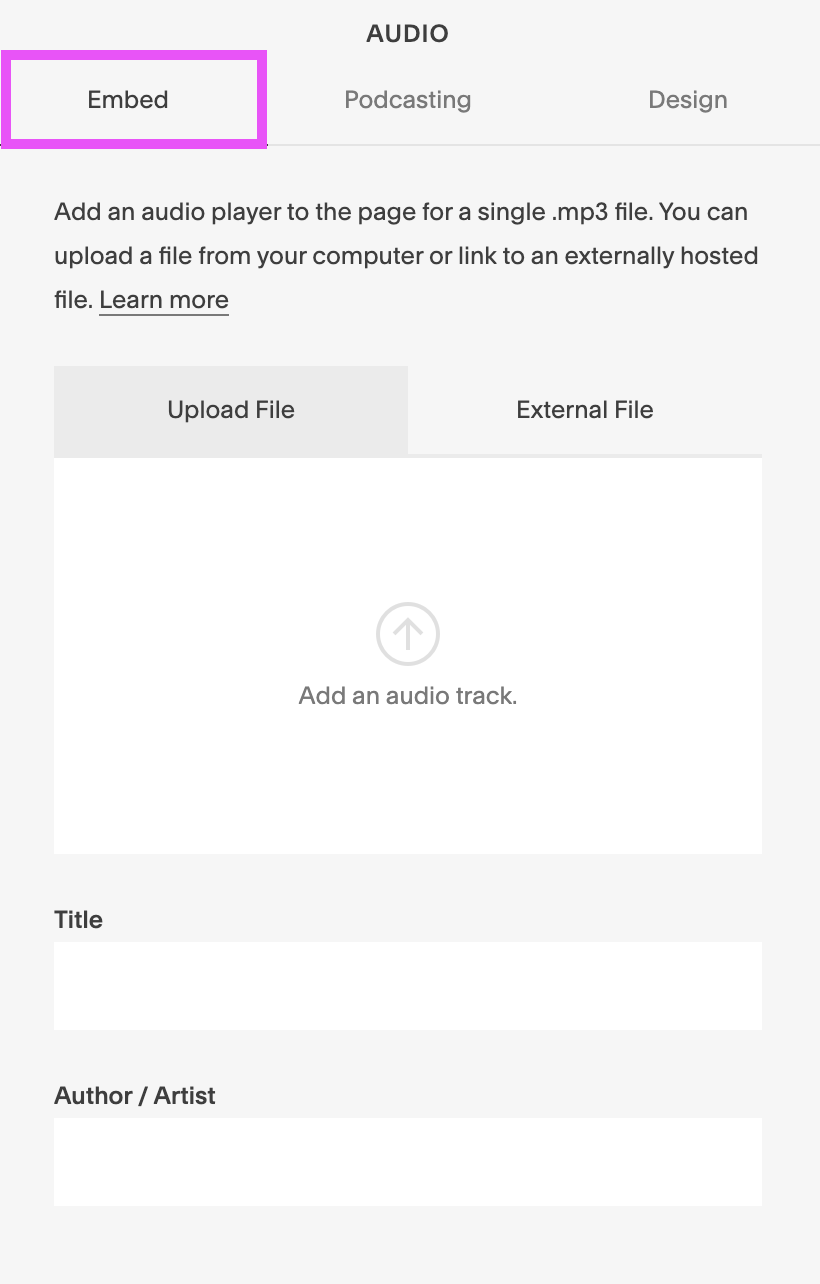
Embed
Under the Embed tab, you can either directly upload a single .mp3 file from your computer or you can click on External File and link to an externally hosted file.
You can also add the Title of your Podcast Episode and your name under Author/Artist.
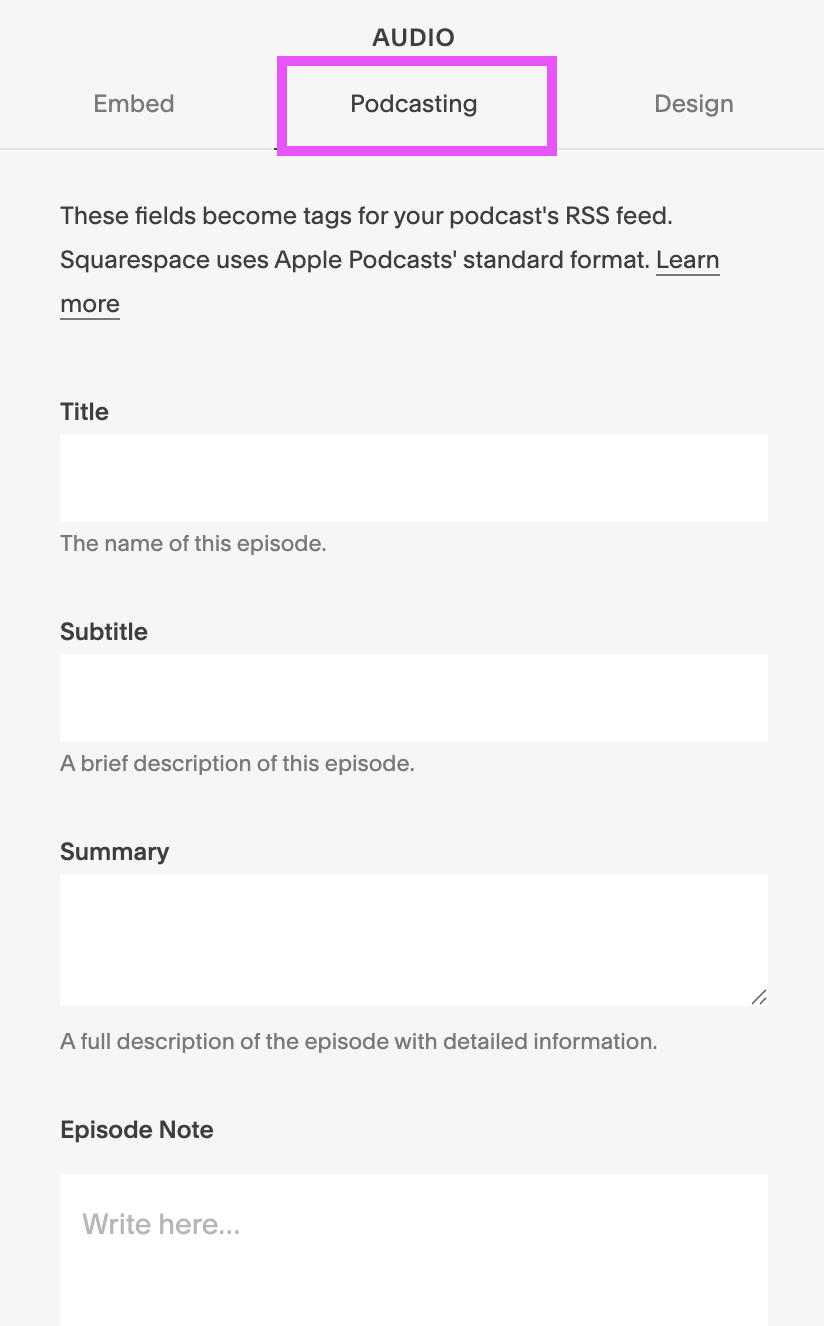
Podcasting
Under the Podcasting tab, you can add all of the information that will be used for your Podcast’s RSS feed. These are the nitty gritty details for your Podcast Episode like
Title
Summary
Episode Notes
Episode Type (full, trailer, etc.)
Season & Episode Number
Episode Duration
This information is important, especially once you start uploading your Podcast episodes to multiple platforms, as it will automatically populate and update wherever your listeners are subscribed!
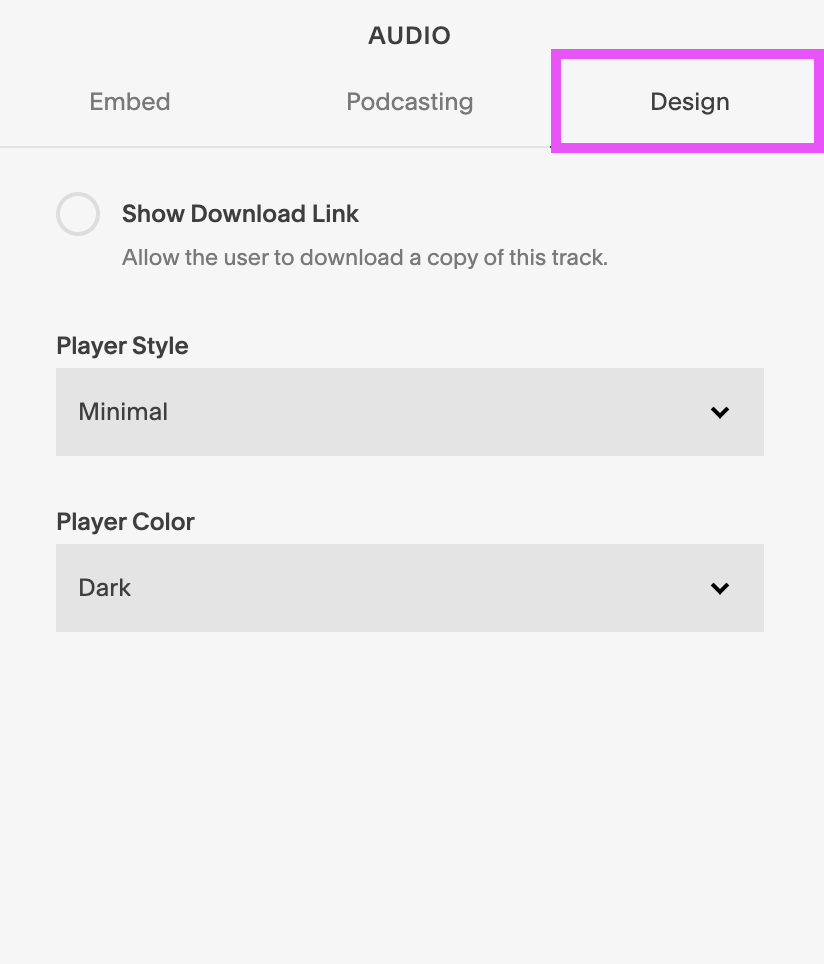
Design
We have to be honest, the design options for the Audio Block are pretty limited, but it’s still worth taking a look!
You can choose whether or not to allow listeners to download a copy of the audio file, whether you want a classic or minimal look for the file, and whether the display color for the audio player is dark or light.
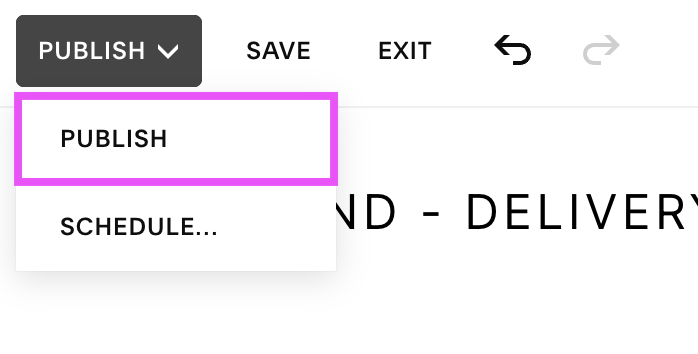
Once you’ve gone through each of these tabs and are happy with the content of your post, go ahead and hit Publish in the top left corner and that’s it, you’ve uploaded your first Podcast Episode!
How easy was that?! And guess what, if you do want to upload your Podcast to Apple Podcasts or any other podcast services, you’ve already done 90% of the work. Check out this information from Squarespace about how to use what you just created to easily submit your Podcast to these larger platforms.
Happy Podcasting!
Want more Squarespace tutorials? Check out the posts below!
How & Why you Should Create a Custom “404 Not Found” Page in Squarespace
How to Deliver an Opt-In Freebie Instantly in Squarespace
How to Upload a Custom Font to Squarespace (7.0 & 7.1)
The Best Linktree Alternative: How to Create a Custom Link in Bio Page on Squarespace
How to Customize Squarespace Forms (and Say Goodbye to Boring Contact Forms)
If you liked this post, Pin it to Pinterest! 👇🏻