

How to Add a Blog Sidebar to Your Squarespace Site (7.1 and 7.0)
Squarespace makes it so easy for you to design a simple, streamlined and clean website, there’s no doubt about that!
But if you’ve been playing around with Squarespace for a while now, you may have realized that it’s still missing some features that have you thinking, “why on EARTH wouldn’t this be included?”
One of the biggest facepalms of the “things Squarespace is missing” list, is undoubtedly the option to have a sidebar on your blog (or anywhere, for that matter).
Not having the ability for a sidebar is kinda crazy if you ask us. If you’re planning to produce a lot of Blog content, a sidebar is a great way of keeping people on your website and reading your posts, so understandably, this is a make or break function for some people.
Luckily, with Squarespace there is always a way to get what you want (if you’re okay with getting a bit creative), OR someone brilliant has invented something brilliant that solves the problem. And in this case, we have both of those options for you (woohoo!).
So, let’s dive in!
What is a Blog Sidebar and hy do you Need one on Your Website?
Just in case you aren’t totally familiar with what we’re referring to, a sidebar is a vertical column that typically appears on the right hand side of a main blog and/or individual blog posts.

Sidebars are mostly used to display content like:
About Me or About the Blog info
Advertisements for products or recent offers
Popular content
Social Media links
And really anything else that’s super important to your business!
Sidebars are really useful in keeping the reader active on the page and on your website in general. If someone is visiting your blog for the first time, your sidebar might introduce information to them that they would have otherwise never seen or create interest in other blog posts that relate to what they’re interested in.
Essentially, sidebars are just another tool in your website success toolbox and definitely shouldn’t be underestimated.
So let’s talk about the best ways to add a sidebar to your website!
The Best and Easiest way to add a Sidebar to Your Squarespace Website (7.0 and 7.1)
Okay, so this is one of those cases where someone truly brilliant has made something brilliant for the rest of us to use!
The Squarespace Sidebar Plugin by Sqsp Themes is an amazing sidebar plugin that makes it as easy as possible to add a beautiful sidebar anywhere around your site.

It’s really simple to install, and once installed it’s so easy to use.
This is such a great solution because the plugin automatically adds the sidebar to ALL of your existing blog posts, meaning you don’t have to go back and update your posts individually with a sidebar or anything crazy and time consuming like that.
The Sqsp Themes sidebar is controlled through one basic page on your website, so if you want to add, remove, or change anything, you can easily just update the content on your designated “Sidebar” page and it will populate on the sidebar throughout all of your blog posts (or wherever you have prompted the sidebar to be placed).
There’s also a ton of styling options if you want to get more advanced, like background colors, spacing, padding, etc.
Here's a super basic step-by-step for getting this plugin going:
First and foremost, you'll want to purchase the plugin and download all of the corresponding files to your computer.
Next you'll upload the two main files (.js and .css) to your site using the link feature in your Not Linked navigation.
Once those files are uploaded, you can create a Sidebar Page in your Not Linked navigation. This is the page where you'll add all of your sidebar content! You can add any content you'd like (text, image blocks, buttons, summary blocks, etc.) on this page and it will automatically populate into your new sidebar.
And finally, you'll copy and paste a piece of code into your website's Header Code Injection. Once that's done, you'll be able to navigate to your main blog page as well as any blog post and see your sidebar.
And if you need a little extra help getting started, the Sqsp Themes website has a really handy tutorial video that walks you through exactly how to get your plugin set-up on your website 👉 YouTube Sidebar Plugin Setup Video
We’ve been using this plugin for years now and haven’t had any problems or glitches with it! Also, any questions we have had about setting it up were handled quickly by the support team of the plugin developers.
We recommend this sidebar plugin 100%. We’ve used a variety of different methods for adding a sidebar, and this is by far the easiest.
Please note that this plugin isn’t created or maintained by us, it is a product from Sqspthemes.com and they will handle any questions or support requests you may have. The link is an affiliate link and we will earn a commission if you purchase the sidebar through our link. We only promote products that we love and use ourselves!
The Slower and More Manual Method of Creating a Sidebar for Your Squarespace Website (7.0 and 7.1)
Now, if for some reason you don’t want to use the Sqsp Themes sidebar plugin, there is another way to achieve a similar result!
This more manual method isn’t overly complicated, however it does take a few tedious steps to achieve, and it can be very time consuming to apply to your blog posts, especially if you have a ton already published (since you have to add it separately to each post).
The good news for you, is that we already ironed out all of the steps back before we knew about the Sqsp Themes plugin and are going to lay it all out for you!
This method will work in both Squarespace 7.0 and 7.1, however the nature of the blog and editing platforms are slightly different between the two versions, so just keep in mind that things might look a bit different depending on where you’re working. For the purpose of this tutorial, we’ll be using version 7.1.
1. Design Your Sidebar
First things first, you’ll need to design your sidebar. You can do this somewhere like Canva or Adobe Illustrator. Any kind of platform where you can design the elements of your sidebar and then save them out individually.
For example, this is what we want our example sidebar to look like:

Simple, clean, and super clear so that readers can easily click through the different blog categories if they want. You, of course, can add anything you’d like to your sidebar!
Once you’ve designed your overall look, you’ll want to then export each element of the design individually. That might look something like this:
Top Image:
Top Image:

Line break:

Buttons:


2. Create a Sidebar Blog
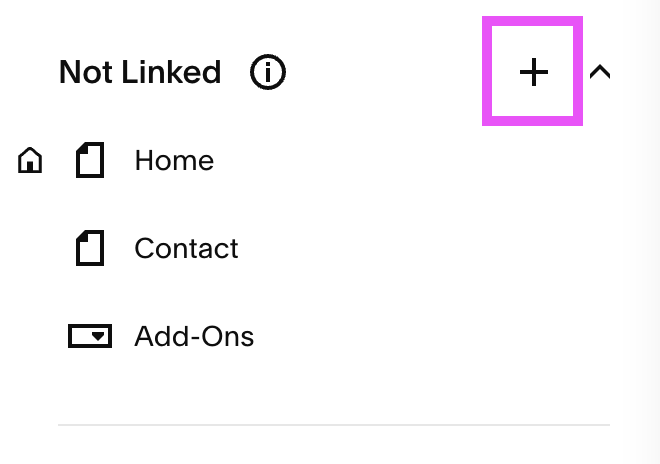
Next up, you’ll need to add a new Blog to the Not Linked section of your website.
To do this, navigate to your Pages Panel and then click the “+” icon next to “Not Linked”.
From the pop-up window, choose Blog.

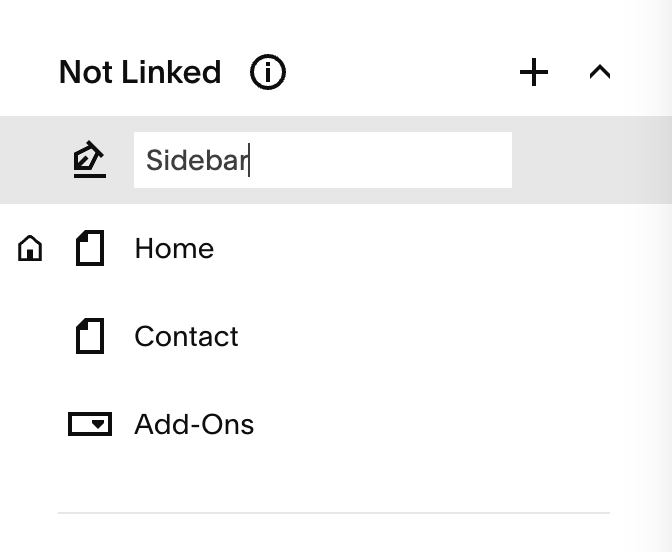
In version 7.1, you’ll be able to choose from any of the Blog templates (you can always edit this later) and then give your new Blog a name. We’re naming ours “Sidebar” just so that it’s super easy to tell what it’s being used for!
3. Add Your Sidebar Blog Posts
Now we’re going to add a Blog Post (in the new Sidebar Blog we just created) for each element of our sidebar.
Our example sidebar has 5 elements, so we’ll end up creating 5 new blog posts. And because the sidebar will display the newest post at the top and the oldest post at the bottom, you’ll first want to add whichever element you want at the bottom of your sidebar.
So, in your new Blog Panel, click the “+” icon next to Blog Content and a new blog post will automatically open up.

You don’t need to worry about adding a post title or any content to the post. Everything we’ll be doing takes place in the Settings window, so you can just go ahead and Exit the post without making any adjustments.
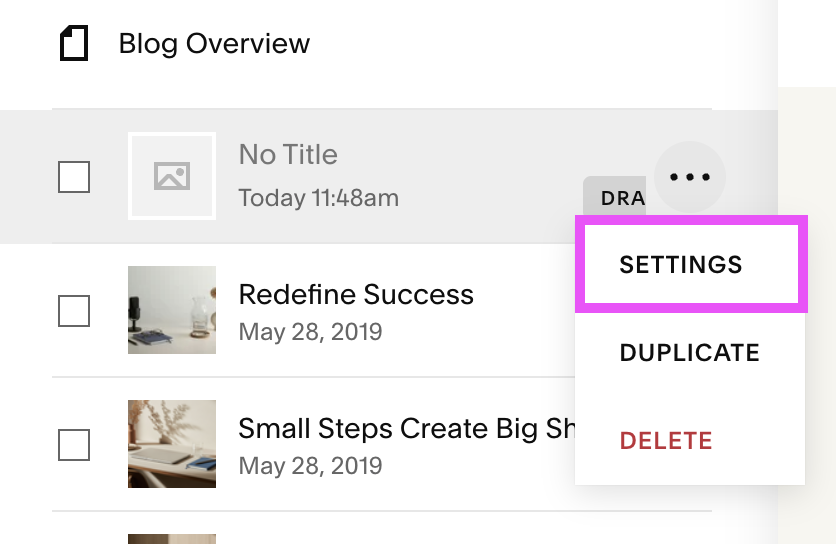
Then, back in your Blog Panel, hover over your new post, click on the 3 dots, and choose Settings.
Tip: If your brand new blog has filler posts (it most likely will), you can go ahead and delete those!
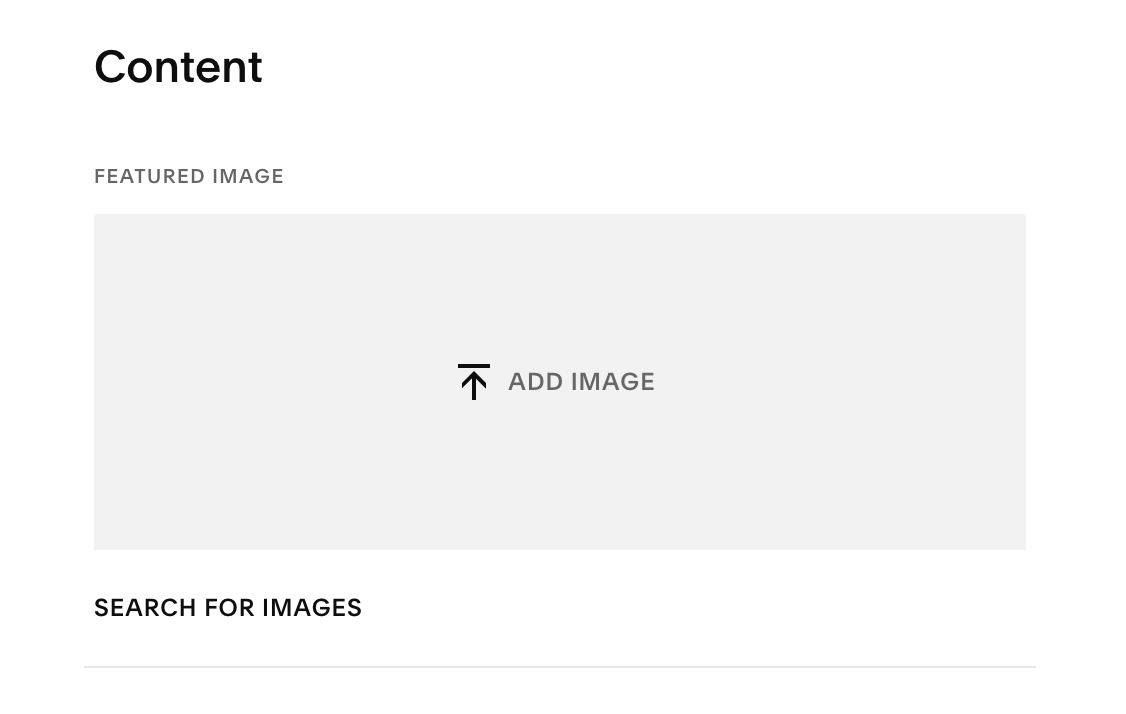
Under the Content tab, you can add your image:
Add an Excerpt if you’d like. If you want to add any text to your sidebar (like how we have a little blurb below our top image) this is where you’ll add it:

And finally, you can add a Source URL and toggle ON the option to link the Post Title to Source URL:
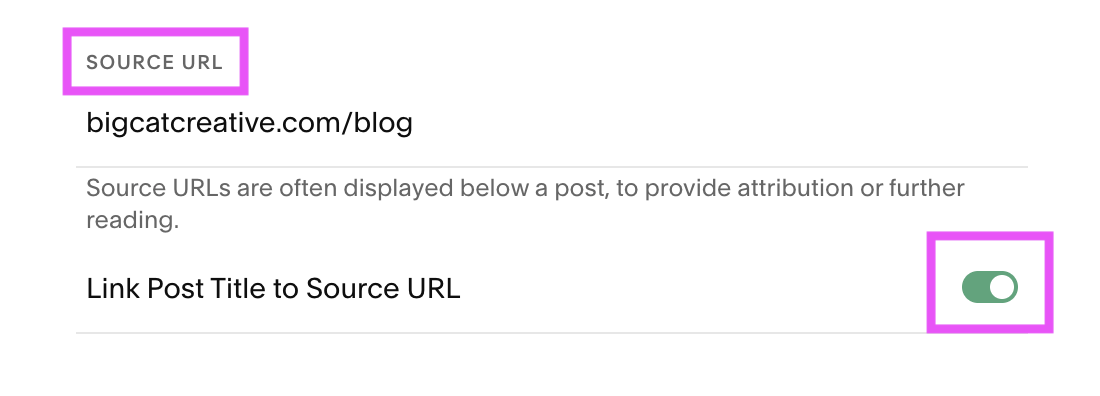
The Source URL is where the element will lead when clicked on! If you’re adding category buttons to your sidebar, you can have this URL lead to your category pages. You can also link to specific blog posts or other pages on your website.
OR, if you don’t want the element to link to anything, you can enter a hashtag (#) into the URL field instead. But be sure that you keep the linking option toggled ON.

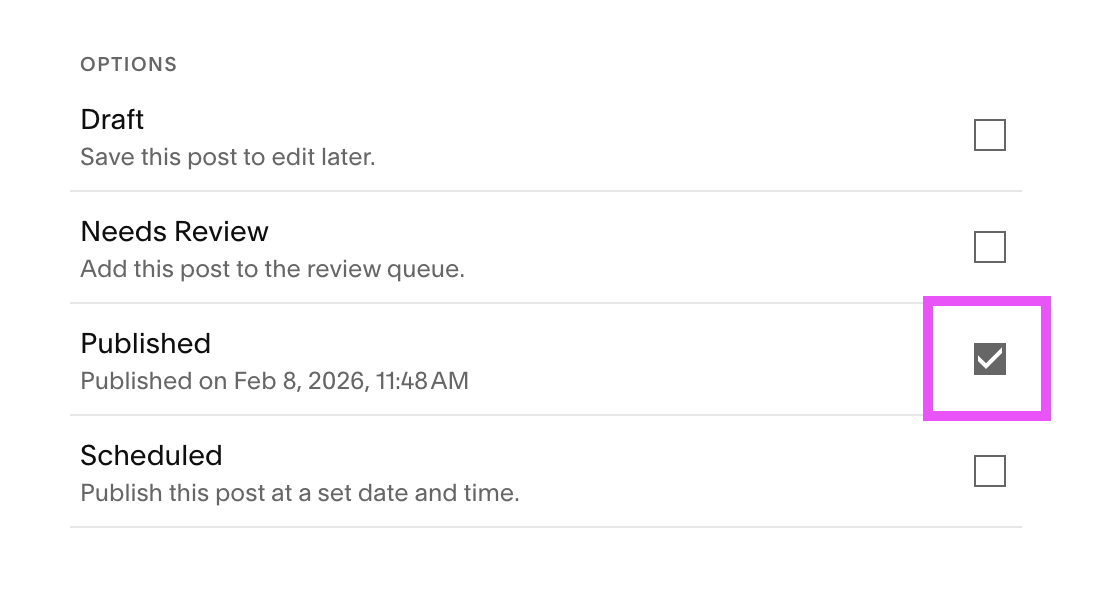
Once you’re finished in the Content tab, head into the Options tab and click into where it says “Status”.

Change the status of your post to Published and then click Save before exiting out of the Settings window.
You can then repeat this process with each of the elements that make up your sidebar, customizing the Settings depending on the nature of the element! In the end, the Blog Overview in your Blog Panel should look something like this, with each individual element saved:

4. Put it all Together Using a Summary Block
In order to bring your sidebar to life, you’ll need to put all of the elements together using a Summary Block!
Now, if you’re using Squarespace version 7.1 or the standard Brine template in 7.0, and you want to add your sidebar to your main blog overview page, you’ll need to get a bit creative to do so since you aren’t actually able to achieve the desired effect on the built-in blog page.
Instead, you can create a new Blank Page and add a Summary Block to showcase your main blog, and then follow the steps below to add a second Summary Block for your sidebar!
And if you’re not super familiar with using the Summary Block for your blog, check out the post below where we go into detail about how you can use this block to customize your blog further.
Otherwise, we’ll be adding the sidebar to an individual blog post, so navigate to your main blog and choose a blog post to work with.
In Squarespace version 7.1, first enter Editing Mode on the post and then click on the first blue “+” icon at the top of the page to add a new block.
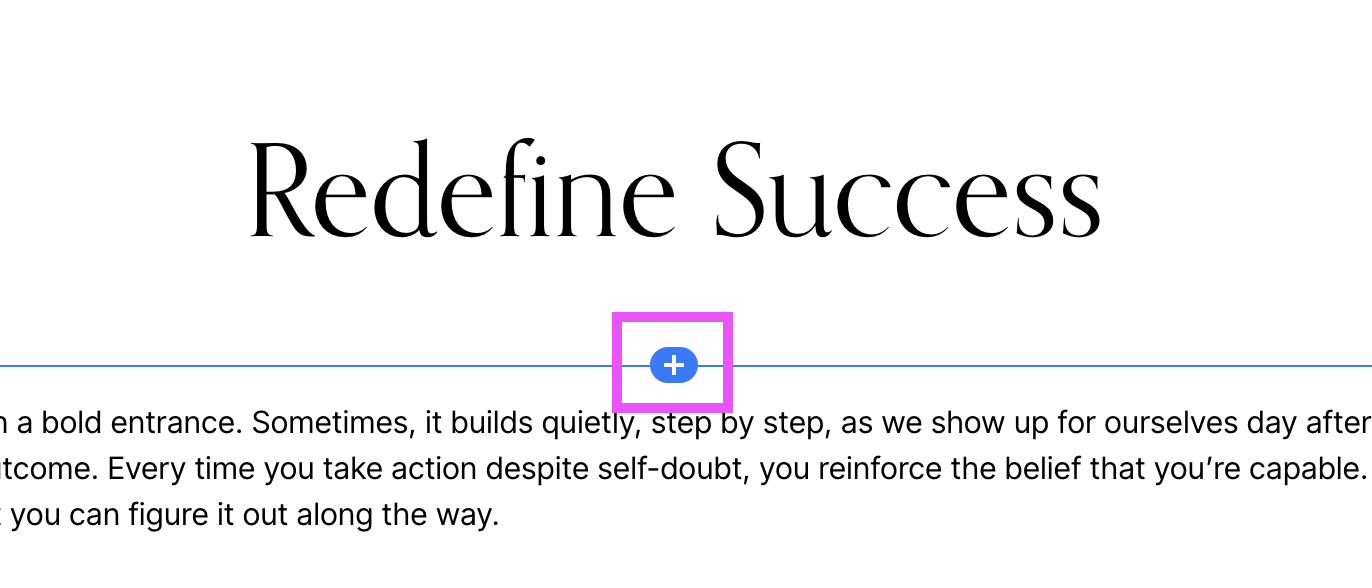
In the Block pop-up window, choose the Summary Block.

Double click on your Summary Block, and in the Settings window, under the Content tab, click where it says “Select a Page” and then choose your Sidebar blog (the blog where you added all of your sidebar elements).


Your sidebar content will appear at the top of your blog post, but it’s going to look a bit funky at first, so here’s how you get it to look like an actual sidebar!
First move the Summary Block to the right side of the blog post. You want the block to be on the right side of everything on the page, so make sure that the blue line indicates that it’s going to be taking up the whole page vs just one piece of content.

Then double click on the Summary Block to head back into the Settings pop-up window and make the following adjustments:
Under the Content tab:
Turn all Metadata to “None” (Primary and Secondary)

Under the Design tab:
Ensure that the layout is set to Wall
Increase the number of items to accommodate all of the elements in your sidebar (it doesn’t matter if you have more)
Align the text to either the left, right, or center depending on your design
Toggle on only the Featured Image and Excerpt elements
Under “Size and Spacing”increase the column width until all of the content in your Summary Block is stacked vertically how you want it. Gutter width can be dragged down to zero
Add a background color or stroke to your sidebar if you’d like


Then, back in the main blog post editing mode, you can resize the Summary Block to be as big or small as you’d like it on the page. Just hover over the left edge of the block until the little double arrow icon appears, click and drag left and right to increase and decrease the width.
You can also adjust the width of your main blog post content by clicking on Edit Section (in version 7.1) and then clicking on Content Width. This can help you to achieve the look you’re going for more precisely.

And that’s that! You can then go ahead and repeat that process for every one of your blog posts and you’ll end up with a beautiful sidebar for your readers to enjoy. And if you ever need to make changes, you can just do so in the Sidebar Blog that you created and those changes will populate in every single Summary Block that’s pulling content from there.

And if you’d like, there are some different ways that you can get creative with the display of your sidebar when adding it manually! We really like this Will Myers tutorial for creating a Sticky Sidebar that follows your content down the page.
You can also play around with various pieces of custom css or more complex coding as well if you want to get really advanced.
Important Tips for Manually Adding Your Sidebar
Be sure to refer back to this tips section if you’re manually adding your sidebar to make sure that everything goes as smooth as possible or if you run into any trouble!
TIP: If you want to go back and add any elements to your sidebar, those new elements will automatically go to the top of the sidebar and probably mess up the order of things. The best way to correct the order of your elements is to change all of the Sidebar Blog Posts to Drafts. Then, go back and Publish them in the order of bottom to top. After you publish them in that order, they will stay there.
TIP: Every thumbnail image that you add to a blog post will either automatically link back to the blog post (which will be blank), or will link to whatever Source URL you enter, so remember that if you don’t want the image to link anywhere, you can add a hashtag (#) to the Source URL field.
TIP: You can format your Excerpt text with H1, H2, H3, bolds and italics etc. so take advantage of these options to make your Sidebar text match better with the rest of your website.
TIP: You can add this sidebar to any page that you want, including category pages. Just duplicate the page you’ve already set up, then change the Summary Block to filter by Category (enter the category that you want the page to be).
TIP: You can add any elements that you’d like to your Sidebar like a Search Bar, Instagram block, or an additional Summary Block to display your most popular posts. You can add these manually with regular blocks to the bottom of your custom sidebar.
TIP: Another way to add a “recent post” or “popular post” to your sidebar is to add it as a section (like we added the other components of the sidebar) and then swap it out whenever you want. You can create a custom thumbnail for it, link back to the post with the Source URL and put some text above it that says “Popular Post”. Once you have set this up you can just go back into the Blog when you want to change it, edit the particular post and change the image and Source URL.
TIP: Avoid putting your sidebar on the left hand side on the blog! This is because: if it's on the left hand side of the blog readers on their mobile will have to scroll all the way through your sidebar info before they get to the actual post - not ideal!
And that’s everything you need to know for adding a Blog Sidebar to your Squarespace website. Hopefully you found this tutorial helpful and will be a sidebar pro in no time!
Loved that post? Check out some more design tips below!
How to create a vertical line in Squarespace (7.0 & 7.1)
How to create rounded corners & unique shapes for your images in Squarespace (no coding!)
How to create a full width Instagram feed in Squarespace 7.1
Creating an “as featured in” logo bar on Squarespace
How to add a button to your header navigation in Squarespace
