How to monetize your Squarespace site with Google AdSense
Google AdSense is one of the easiest ways to monetize your Squarespace site. If you’re drawing a lot of web traffic with your content, this is a simple way to passively create some additional revenue 💸
What is Google AdSense?
Google AdSense is a service that allows advertisers to place ads on your blog, website, or Youtube channel. The program uses an algorithm to match the most relevant ads for your website and then you get paid out for lending your digital space to them. The ads are created and paid for by advertisers so it’s entirely at no cost to you and allows you to monetize work that you’re already creating.
So if you’re ready to start making money on your Squarespace website through AdSense, follow the steps below!
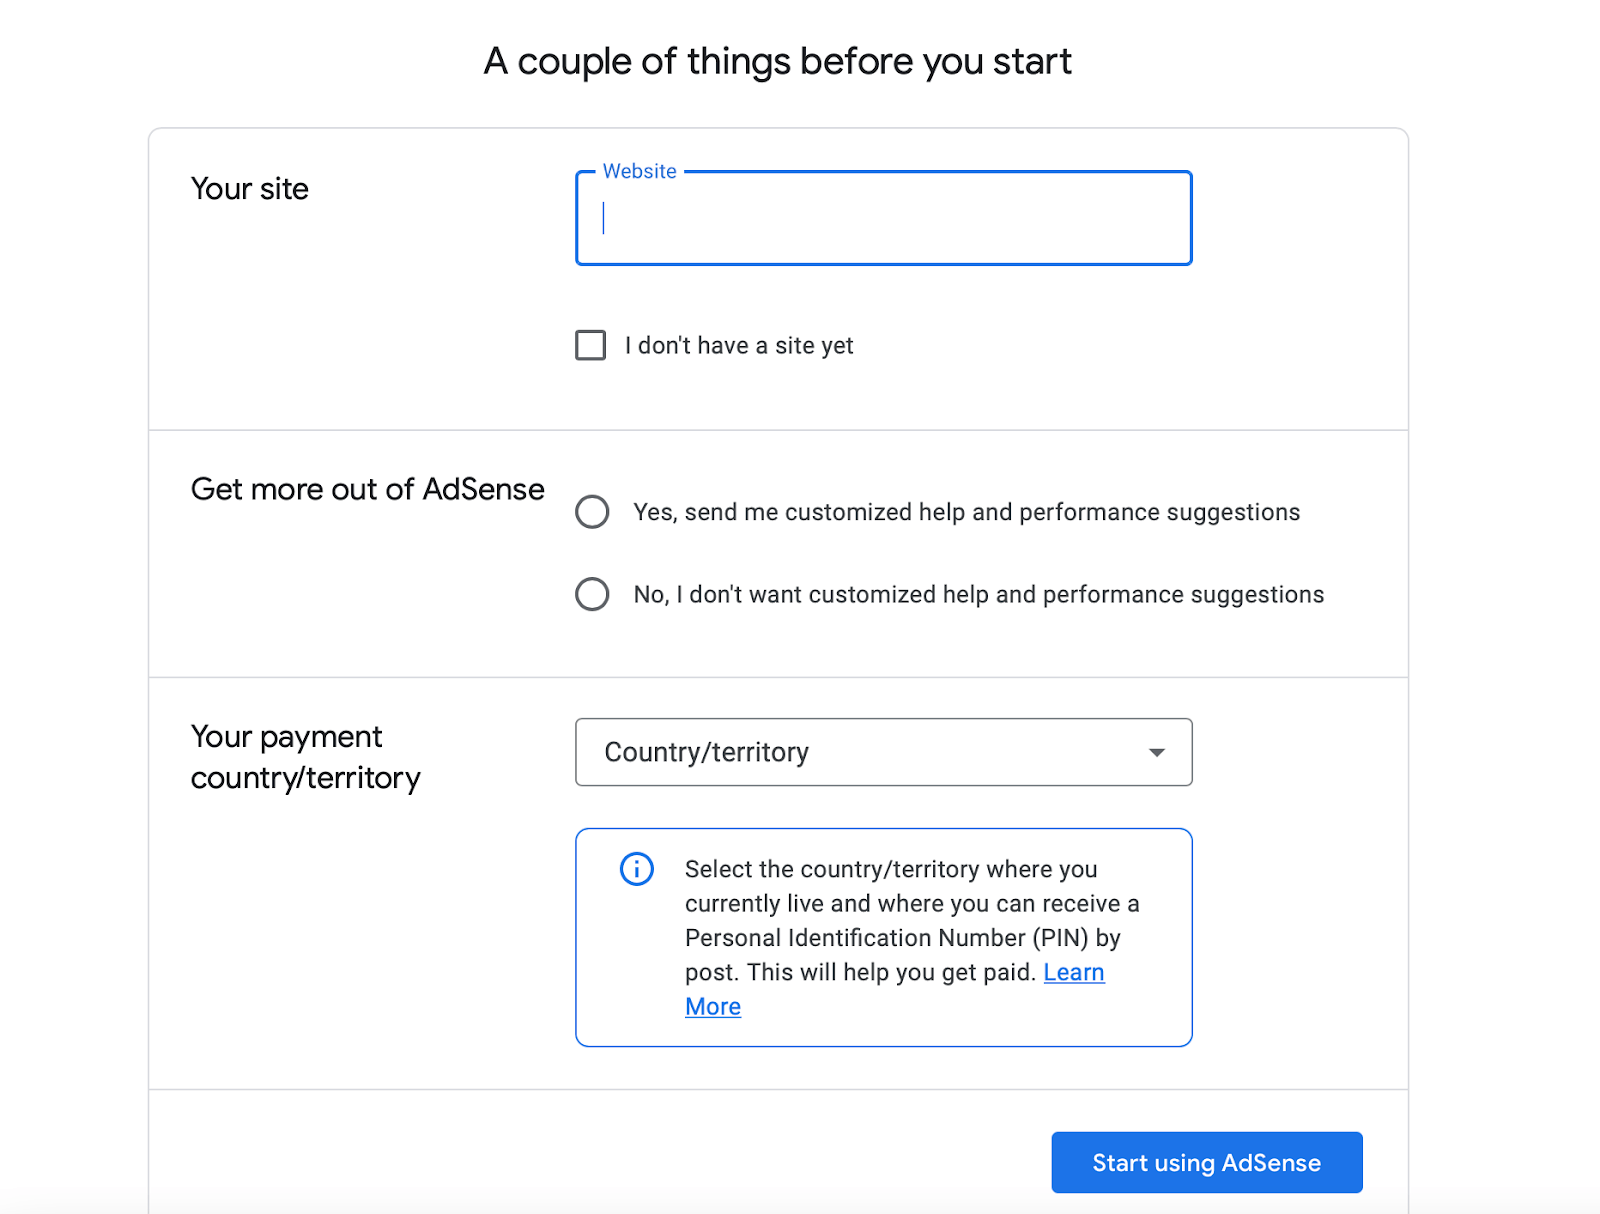
Create a Google Adsense account
Visit google.com/adsense and click the blue “Get Started” button in the top right corner.
Log in to your existing Google account (or create a new one).
Input your information as requested and accept their terms and conditions when ready.
Start by clicking the Payments button and filling out your payment information.
Connecting Google Adsense to your Squarespace website
Click the Sites button to connect your Squarespace website to AdSense.
This will bring you to an AdSense HTML code to input on your Squarespace website.
Click the Copy button underneath the code box to copy the HTML code.
In another web browser tab, visit Squarespace.com and log in to your Squarespace account
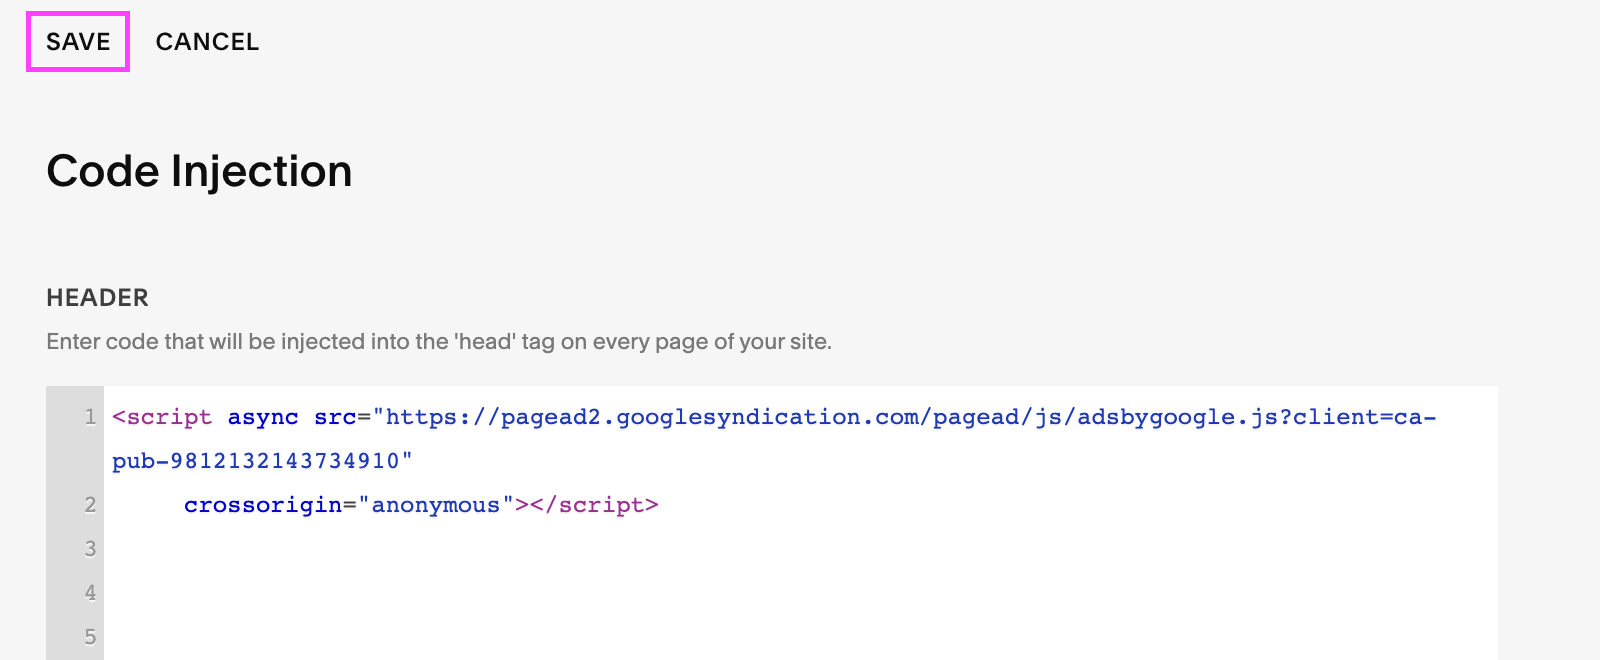
In the navigation menu, click Settings > Advanced > Code Injection
Paste the code you just copied into the Header section of your site-wide code injection.
Click Save in the top left corner.
Navigate back to the original AdSense tab in your browser and click the blue Request Review button in the bottom left corner.
Once a little green symbol shows in the upper left corner of your Google AdSense sites button, you’re all set to go!
So now that everything’s connected, you can choose to either monetize your website with automatic ads or manual ads.
Option 1: Enable auto ads and let Google automatically place optimized ads across your site
This streamlines the process and takes less work on your part.
Simply toggle the button “on” and you’re set to go.
The downside to this approach is that it might impact user experience and website flow. If you have landing pages with offers of your own (such as courses or services), you obviously wouldn’t want to place external advertisements on those pages.
Option 2: Manually insert ad codes across your website
With Option 2, you can insert ad displays with more precision.
Maybe you only want an ad to display in the sidebar of your site… Maybe you only want it on blog pages…
Manually placed ads allow you to have more control over website design, website flow, and user experience.
In the following few paragraphs, we’ll run through both of these options for monetizing your Squarespace site with Adsense.
Placing auto ads on your Squarespace website
Click the Ads button to get started.
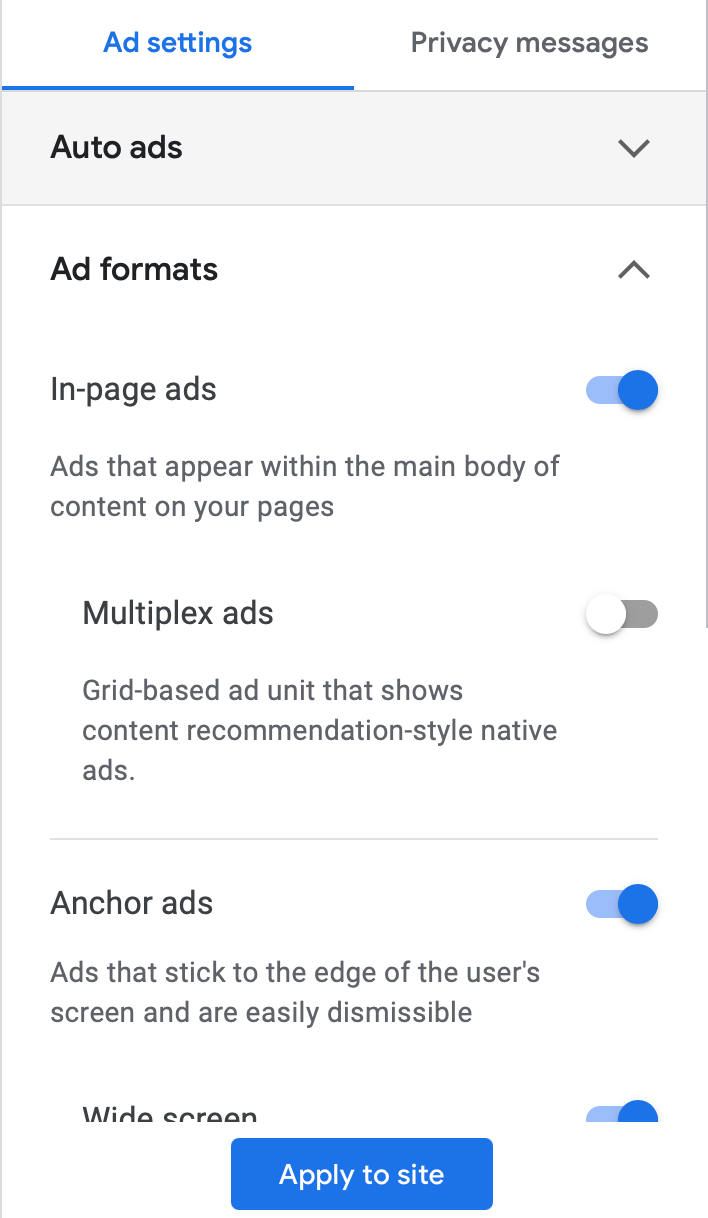
On the right side of your Ad Settings Preview page, you’ll see a panel with your ad settings.
Toggle Auto Ads “on”.
Click the blue button at the bottom of the panel that says Apply to site to save your changes.
A popup confirmation message will appear. Select Apply Now and hit Save.
Even with auto ads, you can customize the ads format that you’d like shown and make some adjustments to the pages that you’d like excluded.
Modify these settings by clicking Edit under the ads button on your AdSense homepage.
Under the Ad Settings in the right panel, you’ll see specific adjustments that you can make to the ad formats that are shown.
In-Page Ads: ads that appear within the main body of content on your pages
Anchor Ads: ads that stick to the edge of the user’s screen and are easily dismissible
Vignette Ads: full screen ads that appear between page loads
Toggle each of these on or off according to your preferences. AdSense will show you a preview example of your website on the left.
Some tips on deciding which ad formats to keep on:
Think about user experience: how might an audience member react to this ad if they saw it as they were scrolling through the website
Think about website design: how might this ad impact the look of your Squarespace website?
Excluded pages: at the bottom of your Ad Settings panel, you’ll see a spot that allows you to manage excluded pages. Even with Google automatically placing ads across your website, you can still direct the platform to omit select pages from their general process.
Some tips on deciding which pages to exclude ads from:
It’s always a good idea to exclude ads from the homepage. Think about how you would react if you landed on a website and were automatically bombarded by ads? This first impression matters and impacts your trust factor.
It might be a good idea to exclude ads from pages that are selling offers. If you have your own products, services, or courses, having external ads compete for your audience’s money might not be a good idea.
How to exclude Auto Ad Placements on specific webpages
Click the blue Manage text to the right to edit the pages that you’d like to exclude ads from.
Click + Add Exclusion to add a page that you’d like to exclude ads from.
Manually enter the URL of the page that you’d like excluded.
You have the option to exclude a single page or to exclude all pages under the entire section that has the same URL prefix. An example of this would be your blog where all the blog posts start with “/blog” and then follow with specific words afterwards.
Click Add to save your changes.
Click the left-pointing arrow in the upper left corner of that panel to go back to your main ad settings.
Hit the blue Apply to Site button to save your settings
Monetizing your Squarespace site with specific ad units
Other than placing ads across your entire site, you can choose to place specific ads in select areas of your website. This can be used instead of auto ad placements or in addition to auto ad placements.
Removing site-wide auto ads
If you prefer to place specific ad units in select places on your Squarespace website instead of site-wide auto ads, the first step is to remove the Google ads code.
To do so, you’ll simply go back into your Squarespace website.
Click Settings > Advanced > Code Injection
Highlight the Google AdSense code you placed in earlier and delete the entire code.
Click Save in the top left corner and you’re good to go!
Placing specific ad units on your Squarespace site
Display one-off advertisements in specific places on your site with manual ad units.
Within the Ads Experience section, click the By Ad Unit tab at the top of the page.
You’ll be given four different ad unit options to choose from. In this example, we’ll select display ads but depending on where you plan on placing this ad, you may opt for a different type.
First, name your ad unit in the top left corner.
Modify your ad appearance
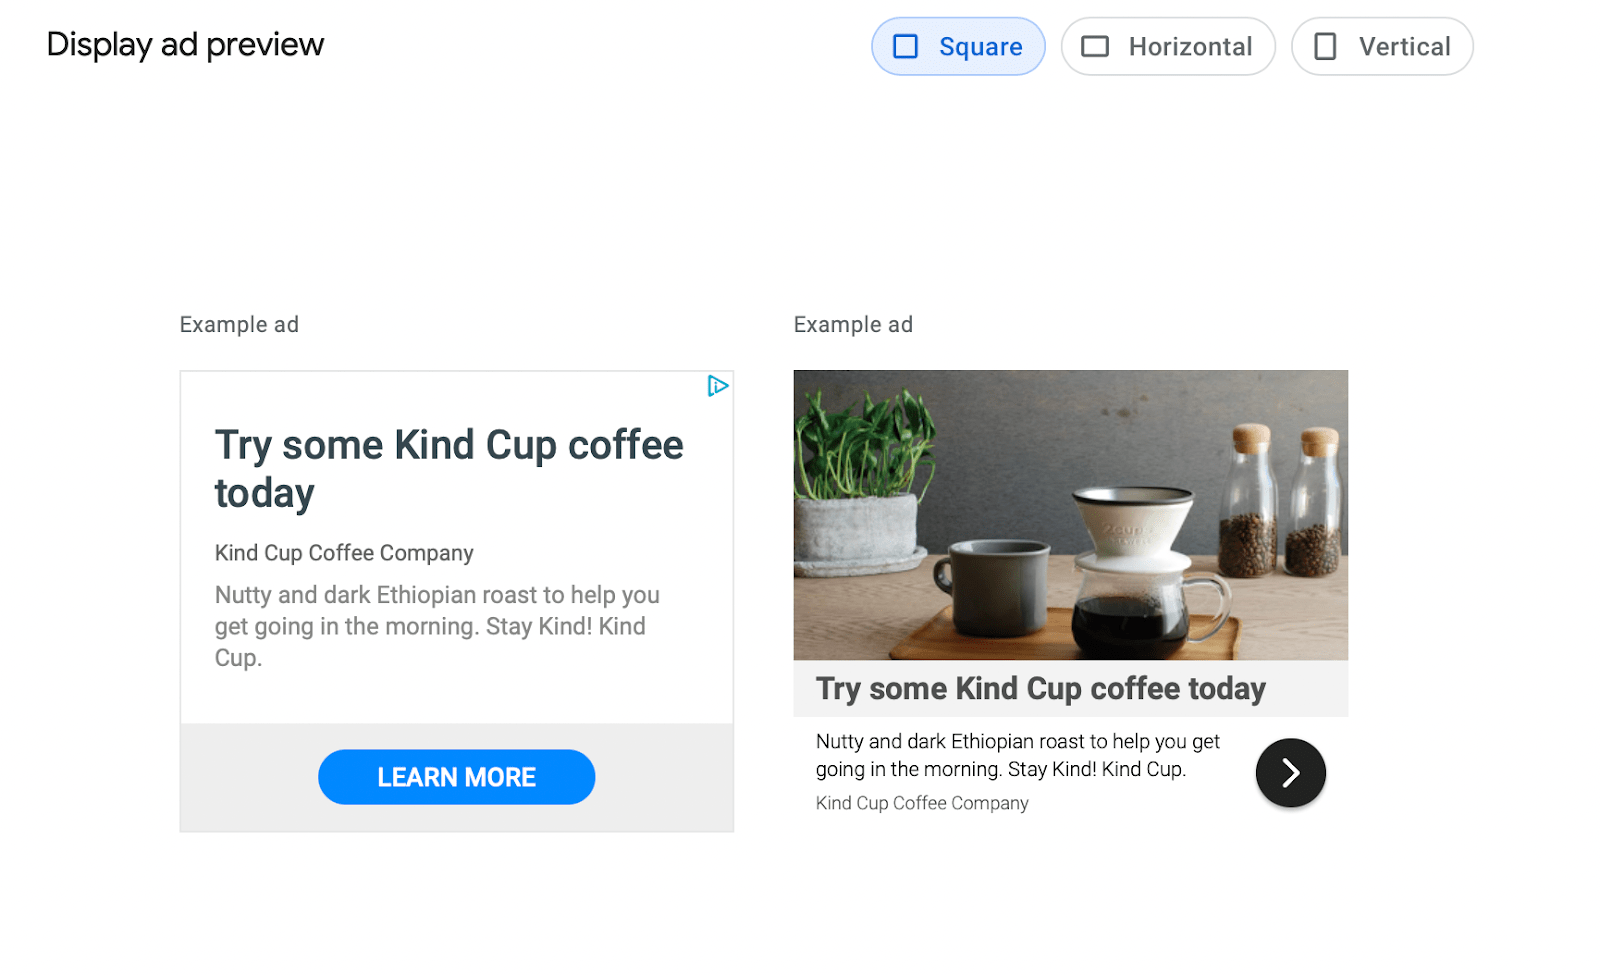
Depending on your page layout, you may choose between a square, horizontal, or vertical ad type.
Square: equal in height and width. Is a good all-round option regardless of where your ad is place.
Horizontal: greater in width than in height. Is a good option for ads in the footer or in-between content on your page.
Vertical: greater in height than in width. Is a good option for sidebars and narrow columns.
Select the ad display that best fits your needs. For this example, we’re choosing a horizontal format.
In the right panel, you can also adjust the Ad size.
Responsive: adapts to your page layout and might look different from the examples shown. We like this option because it optimizes the appearance of the ad regardless of the device it’s displayed on (desktop, mobile, tablet)
Fixed: specify the width and height of the ad you’d like displayed. Good option for more control over how your overall page looks. Please note that AdSense only supports certain ad sizes so you’re still limited to those constraints.
Choose the option that works best for you and select the blue Create button on the bottom to move on.
Once the ad has been created, you’ll be directed to a code page.
Copy the HTML code snippet provided.
Navigate to the page and place on your Squarespace website that you’d like this ad unit displayed:
7.1: Click Add Block in the top left corner of the section
7.0: Click the blue + icon to add a block
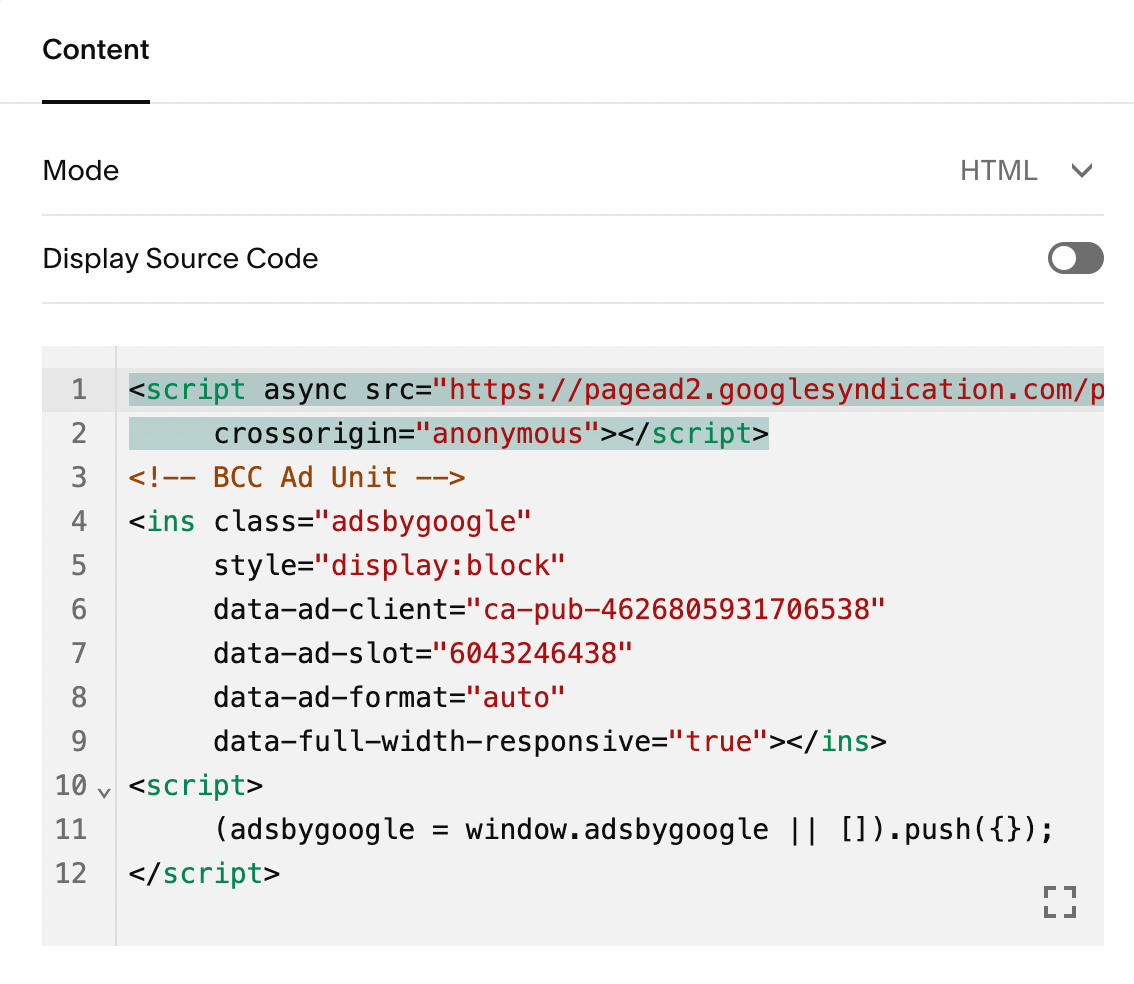
Select the block that says Code.
Paste the Google AdSense HTML code into the space provided.
Your Squarespace site will show Script Disabled where the code is pasted but rest assured that this ad unit will display on your website.
Click Done > Save in the top left corner to save your changes.
Now, repeat this process for anywhere you’d like this ad unit to display or create separate ad units if you’d like to track the efficacy of your placements!
So you’ve officially monetized your Squarespace site with AdSense…now what? Well, in order to make money off ads, you need website traffic! While SEO is an extremely complicated topic, it only takes a little bit of work to get started. Here are our top 5 quick & easy SEO tricks for Squarespace and 3 free tools to research keywords for SEO to help you get a leg up in making more revenue!
If you liked this post, Pin it to Pinterest! 👇🏻


