How to Optimize Your Squarespace Blog Posts for SEO
If you’re already have a Blog on Squarespace, you know the value that it adds to your business. Posting a regular blog can do many great things for your business, including increasing your Search Engine rank (Google loves a regularly updated website!). But, how do we make sure we are doing our best to get those posts read? You’re investing so much time writing Blog Posts (trust me, I know how time consuming it is) that it would be a waste if no one was reading them. So how do we get the best chance of people reading them? It’s all about that Search Engine Optimization (SEO).
There’s many myths that Squarespace SEO is not up to scratch or there’s not enough options to add SEO features. But don’t worry, adding SEO in Squarespace Blog Posts isn’t hard, and it’s highly effective. If you know how to do it (which you will by the end of this post).
👉 Is SEO Dead? A Candid Conversation on AI, Blogging & Squarespace with Henry from SEOSpace
What to do to Optimize Your Squarespace Blog Posts for SEO:
Keywords
Search engines “read” through your blog posts to figure out what your post is about. They do this so that they can give the searcher accurate answers to their searches.
Because these search engines aren’t people, the way they figure out what your content is about is by an impressive, and always improving, algorithm (robot stuff) that sorts through all of the words and phrases in your post.
So, to help Google (or other search engines) figure out exactly what your post is about, it’s helpful for you to include “keywords”. The more Google understands what your post is about, the more accurately (and hopefully more often) it will show your post in search results.
Keywords are words that are the most important points of your blog post topic.
For example, keywords for this post you’re reading right now might be: “SEO, Squarespace, Blog, Optimize”
Use more of these keywords in your post and you have a better chance of ranking higher on Search Engines. The Search Engines look for these keywords and match them up to what someone is searching. The more of these keywords, the more relevant the post probably is to the person searching.
Keyword phrases are basically phrases or sentences that contain the keywords together in an order that just makes sense to your post. You’re likely to use relevant phrases like this in blog posts.
For example, keyword phrases for this post you’re reading right now might be: “Optimize your Squarespace Blog Posts for SEO” and phrases similar.
It’s likely that you’d use phrases like this in your blog post without thinking about it, but now you will think about it. They are more specific than keywords so they’re great for ranking for specific searches.
The aim is to try to use these Keywords and Keyword Phrases all through your post. Now, I don’t mean go crazy and add it in every sentence, that’s just going to annoy people, and actually, if you have TOO many, Search Engines have been known to rank you lower for “keyword stuffing” (yes, that’s how smart they are!).
So keep in mind that that having your readers stay and get valuable information from your Blog is more important than adding keyword phrases every line, your reader is your priority! But generally, these two things go hand in hand nicely, and if done well, your reader won’t even notice (but Google will!).
As well as adding them throughout the post, you want to make sure your keywords and phrases are in your post title, subtitles, the URL slug and excerpt if you’re using one.
Blog Post URL Slug
Another easy place to add extra keywords to let Google know what you post is all about is your Blog Post URL slug.
You can adjust this by going to your Pages panel > Blog page > Hover over the Blog Post > Click the three Dots > Select Settings > Edit the Post Slug:
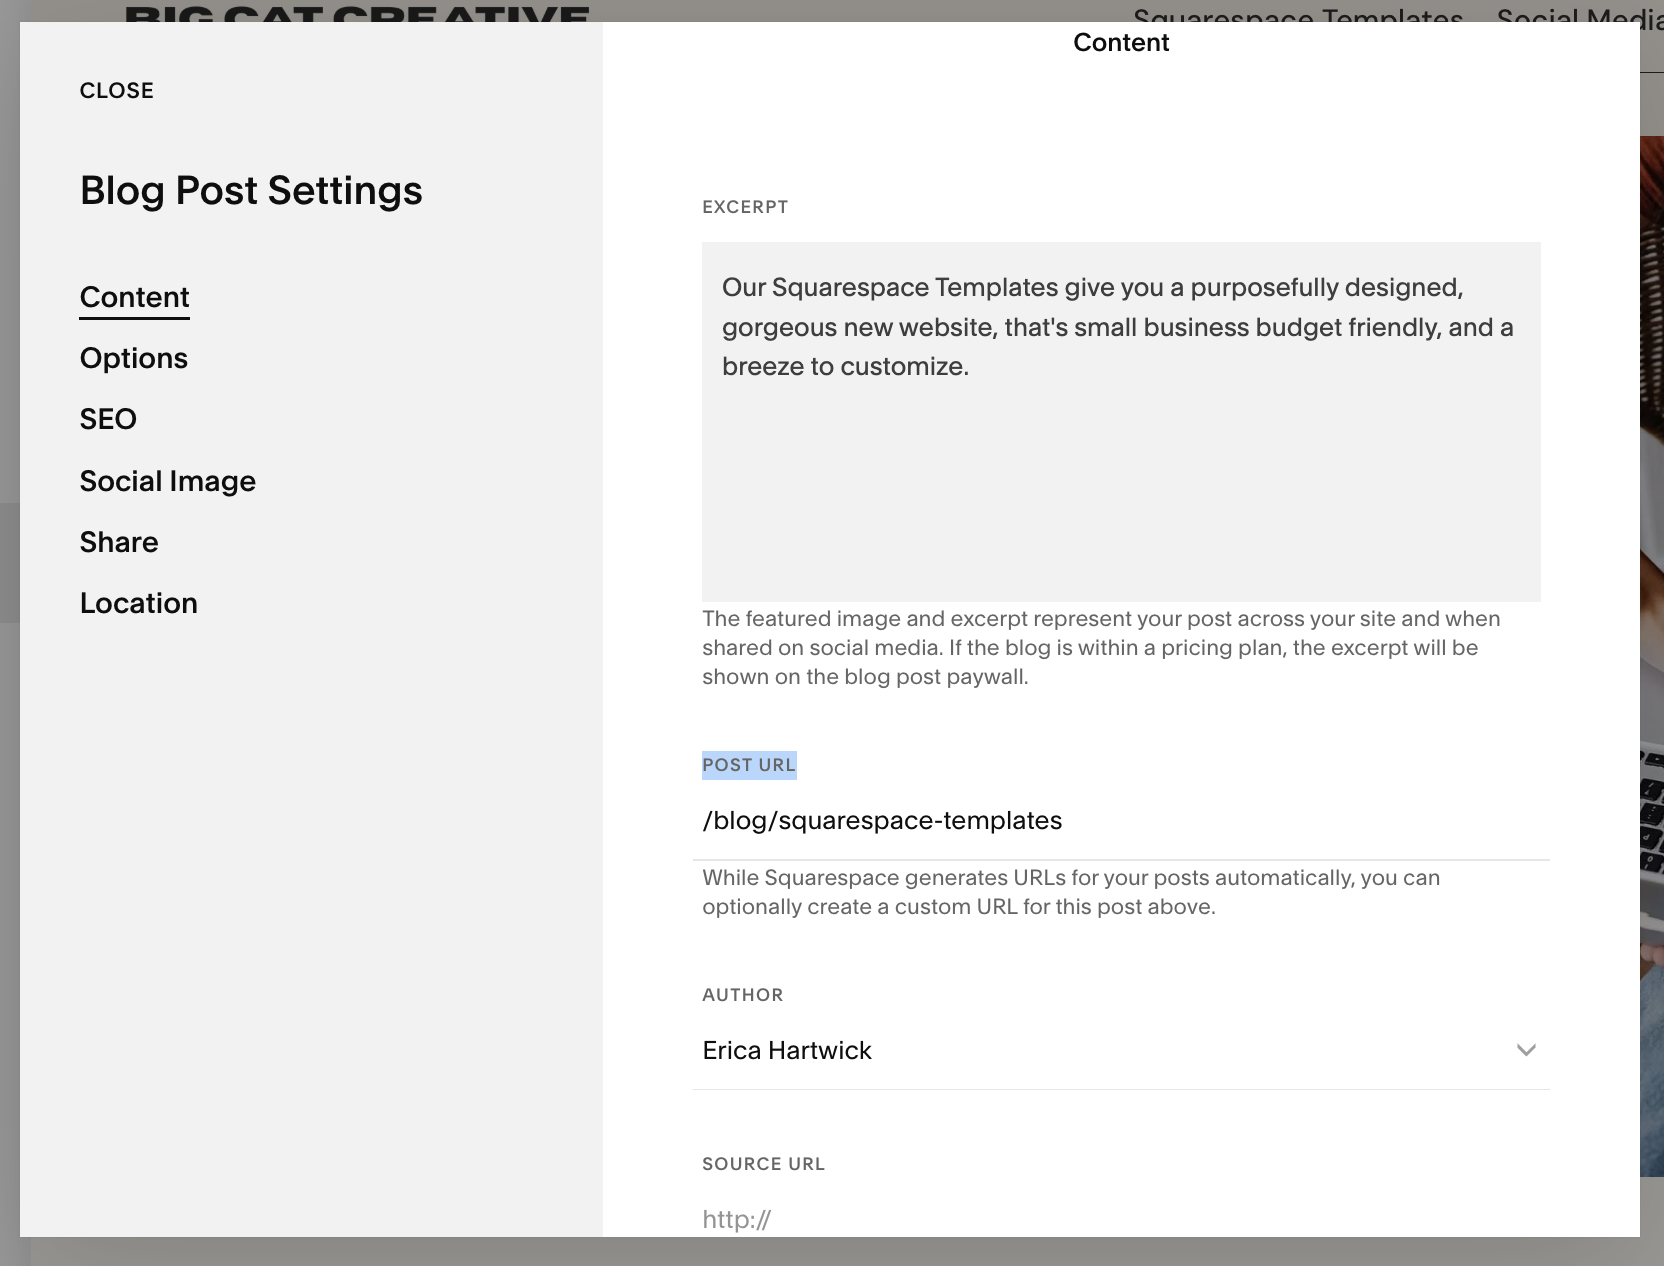
Make sure your Blog post slug contains keywords or phrases and is clear, and doesn’t contain any out of place numbers, words or symbols. In most cases it should be the same as, or a version of, the Blog post title.
You can leave out filler words like “and” “if” “the” etc, and just use the main keywords. Shorter is better.
For example, the title of this post is: How to Optimize Your Squarespace Blog Posts for SEO
But the URL slug is just: /optimize-squarespace-blog-seo
Add Titles to Your Images
Because Search Engines can’t see what images are (they can only read text), they search for the image name in the hopes that the image name will be representative of what the actual image is. This means you have to name all of your images accordingly. Even though you can’t see this name in your post, Search Engines can. I like to use my keyword phrases within the image titles.
You can do this in two different ways:
Name the actual file, ideally on your computer before you upload it, or directly in the Asset Library after you upload it.
Once you upload it, you can also rename it in the actual image block settings under Filename.

Reduce the Size of Your Images
This one is SO important. If your images are too large, they will slow down the loading of your site. Search Engines hate slow loading pages, and this is a sure way to get pushed to the bottom of Google.
Squarespace has a lot of automatic image optimization features to reduce file size depending on screen size, which is great for SEO, but you still need to do your part too.
My rule of thumb is to get the image size as small as possible without losing quality.
For banner images (spanning the width of the whole site) or very large images, I aim for under 500KB.
For special portfolio pieces where I want the image large and high quality I sometimes will go over that a little bit, but I try not to, as it can hurt the ranking of your site as a whole.
Usually in blog posts where we use mostly screenshots and smaller images, these come way under the 500KB mark, usually between 50KB-200KB which is great.
If you are using larger images, try to get them as far under 500KB as possible. If you have Photoshop, using the Save for Web feature is the best way to do it. If you don’t have Photoshop, you can open up your image in the Preview app (on Mac). Click Tools > Adjust Size and adjust the size until it’s under the required KB (this is OK for screenshots, but not for good quality image compression)

For Banner images I usually go around 2500 pixels wide, and other site images between 500-1500 pixels wide depending on where you will use them. For blog post images like screenshots, I leave them at their original size (which is generally pretty small), and then compress them in Photoshop with Save for Web, or with the method below.
You can also compress your images by using a site like compresspng/jpg (You can choose between JPG or PNG). Upload your file here, it will compress it as much as possible, then you can re-download it. Usually it will compress it by a large percentage without losing any quality. This is such a useful tool and I suggest compressing every image you upload with this if you're not using Photoshop.
So, first resize to the appropriate size, then compress if you need to in Photoshop of via CompressPNG/JPG.
This step seems like a lot of work, but let me just say that you would have to do this on ANY website platform, not just Squarespace, and it is so worth it. If you website is loading slowly, not only will you rank low on Search Engines, but people also won’t stick around to wait for it to load!
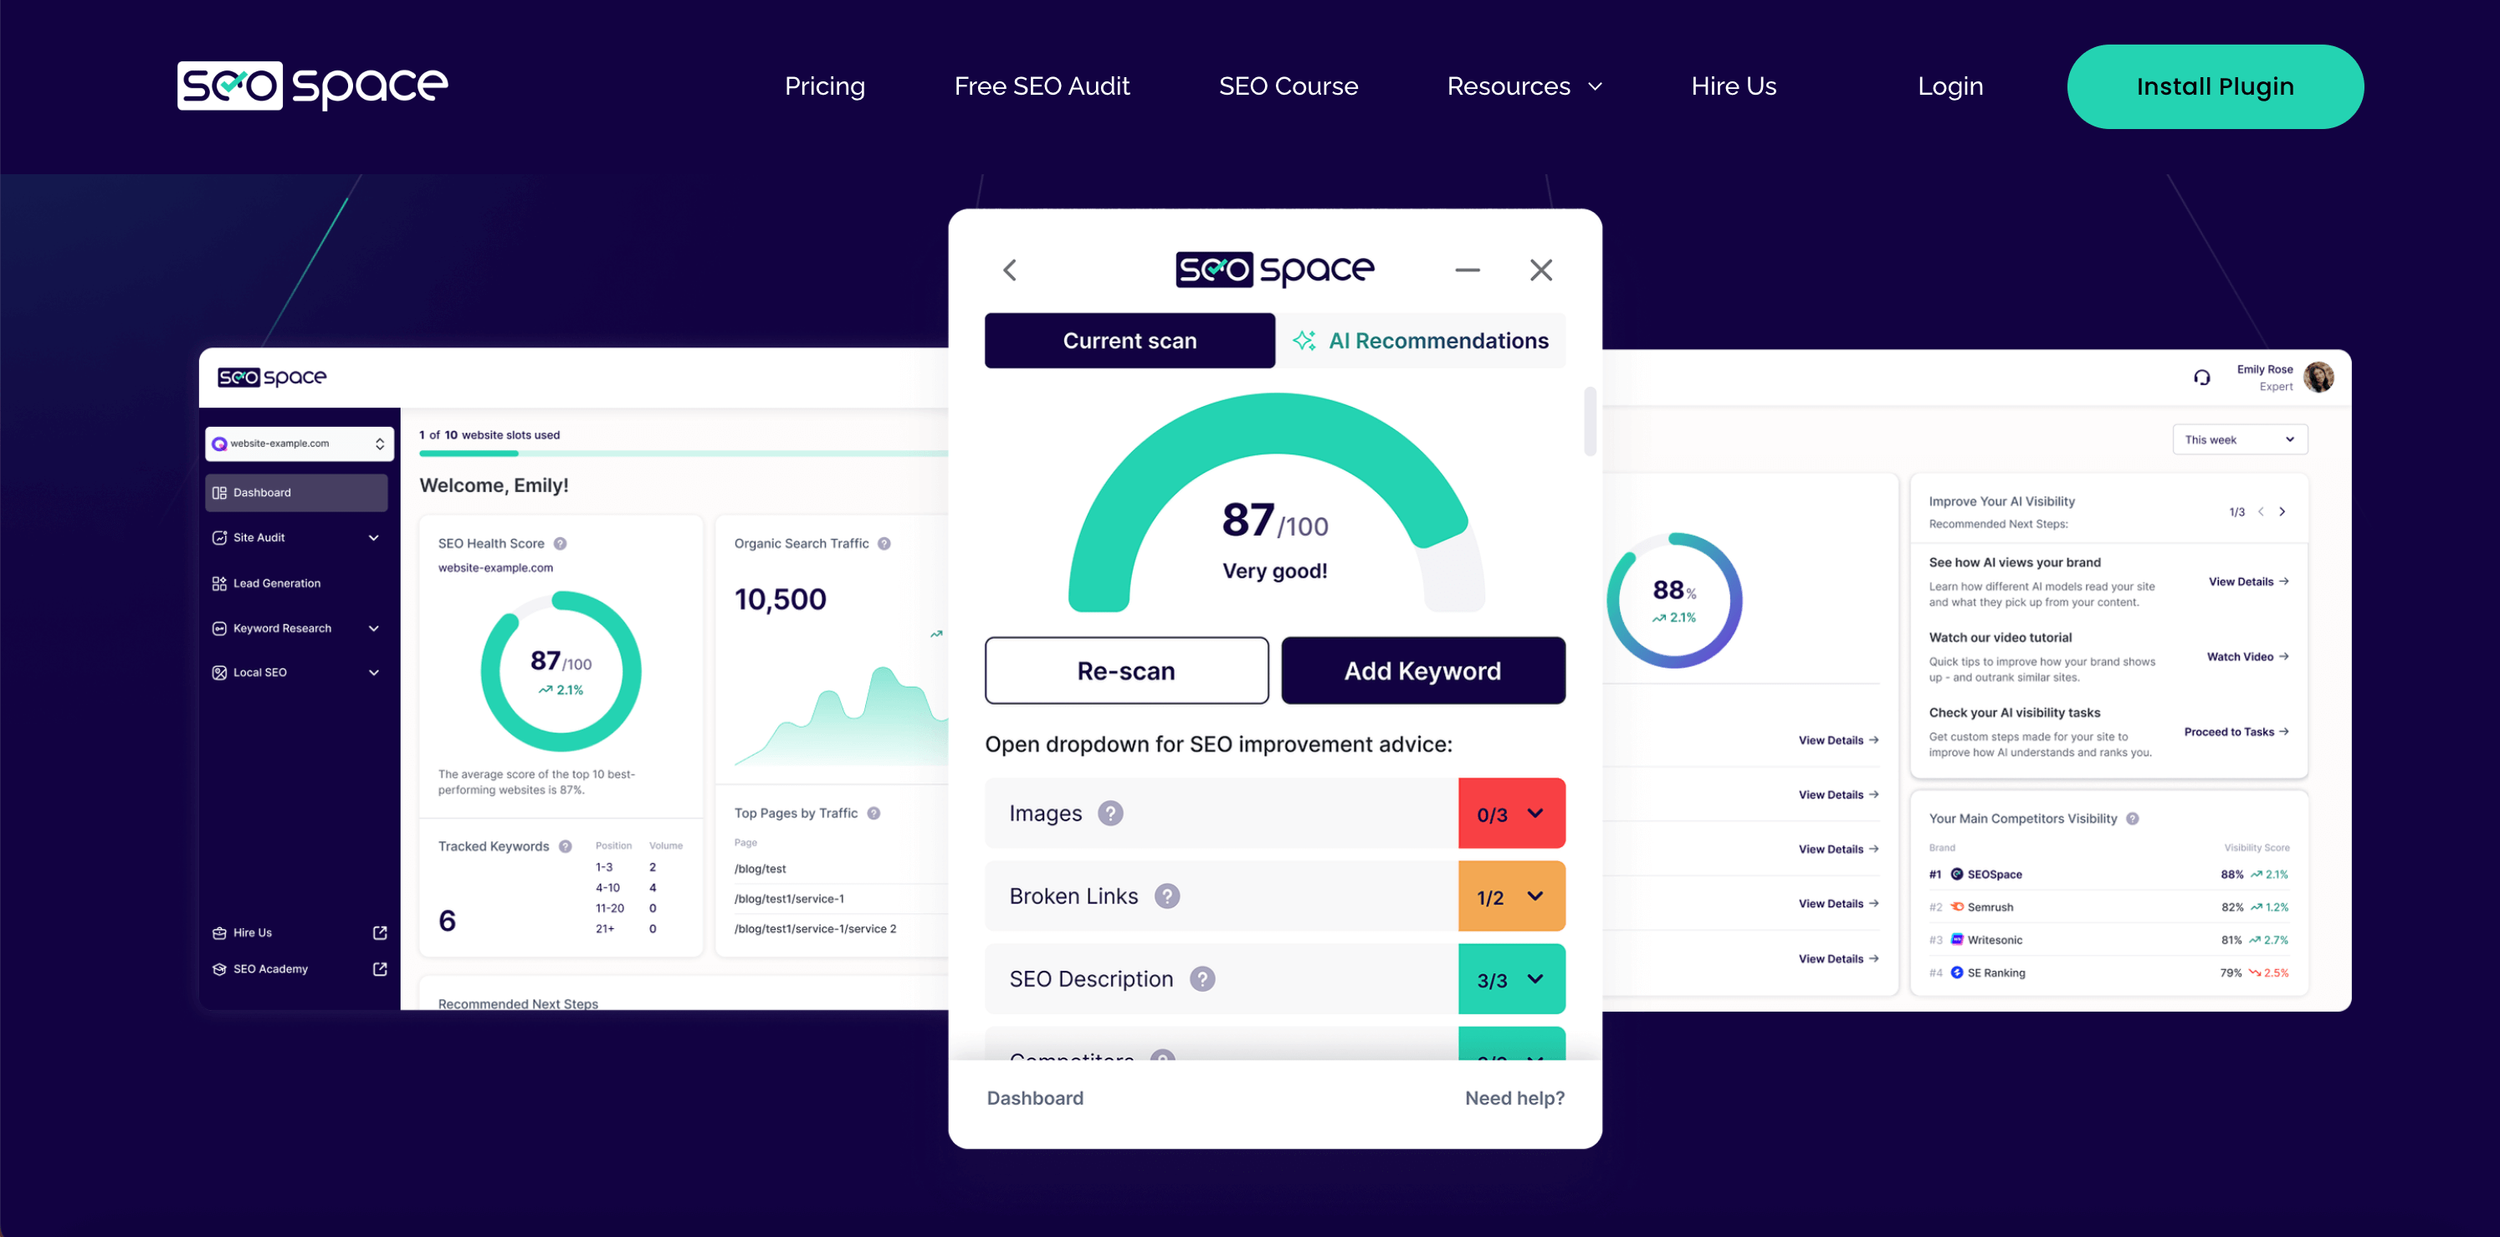
Use SEOSpace
If you’re ready to give your Squarespace blog a little SEO glow-up, SEOSpace is your new best friend. It’s a super handy Chrome extension made just for Squarespace users, designed to help you boost your SEO without the overwhelm.
SEOSpace scans your blog posts and points out exactly what needs a little love, like missing alt text, keyword opportunities, heading structure, or slow-loading images so you know exactly what to fix (and what’s already looking good!).
👉 Start a free SEOSpace trial here or use discount code BIGCAT30 for 30% off for your first 3 months.
Congrats! You made it all the way to the end - phew! That seems like a lot of information to take in, doesn't it? But I promise, once you get the hang of it, it really easy. I do all of these things without even thinking now. It only takes a couple of times before you'll get the hang of it, and it's worth the little bit of extra time it takes.
Want more blogging and SEO tips? Check out the posts below:
How to create a ‘featured post’ slider in Squarespace 7.1 & 7.0
How to link to your blog categories on your Squarespace Site
How to add a blog sidebar to your Squarespace site (7.1 and 7.0)
How to create a blog post template in Squarespace
How to Get Your Squarespace Website on Google: A 5-Step Guide
Squarespace SEO: Boosting Your Site's Visibility with our go-to SEO Checklist
Liked this post? Pin it to Pinterest! 👇