

How to create a fillable PDF workbook (in Canva for free!)
Workbooks are an amazing resource for any small business. Whether as a freebie that you send your website visitors when they sign up, or as part of your next online course, workbooks can cover just about any topic that you can think of and can include anything from text, to images and links. They are totally customisable and oh-so-easy to build in a software like Canva, meaning your workbooks can fit your branding to a tee, while showcasing a heap of useful information.
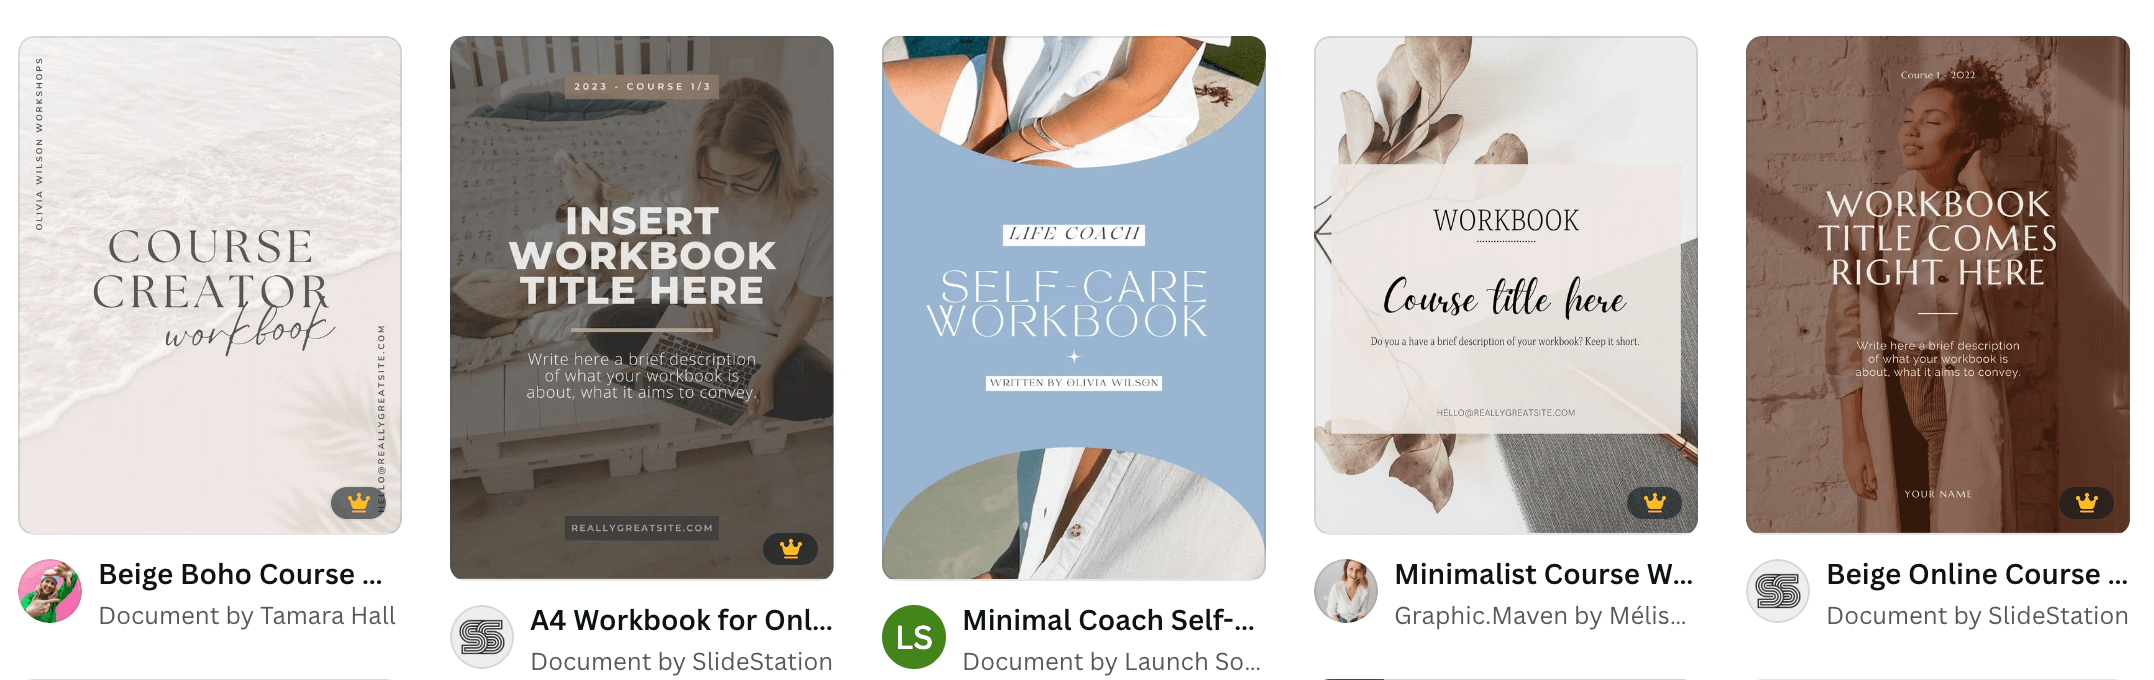
Even better, Canva already has some workbook templates designed for you that will make creating beautiful workbooks just that much quicker:
Want to take your workbooks to the next level? Make them fillable to create a fun and interactive resource that your audience will really enjoy using. Rather than having to take notes in a separate word or google doc, give them space to write down their answers directly in your workbook!
No fancy software or expensive tools required, in this blog post, we’re showing you how to create fillable PDF workbooks for FREE with just your Canva account, PDFescape, and a little creativity ✨
Step 1: Create your workbook
Go to Canva.com and choose a workbook template or design your own from scratch.


Helpful tips for designing workbooks:
Make sure your workbook is legible!
Your fonts should be big enough and easy to read (this means no fancy handwriting fonts!).
Use black or a dark colour for your text and a white or light colour for your background so that your readers don’t have to strain 👀
Keep your graphics and layouts simple so that your workbook is easy to follow in a chronological order.
Space it out!
Remember you have total control over the length of your workbook. Obviously, you might not want it to be 180 pages long, but spacing out your content across multiple pages is a great way to make it easier for your readers to digest.
Remember to also leave adequate spaces that your readers will be able to fill in with notes and answers. Add a rectangle shape in your workbook to indicate fillable spaces.

Use visual elements
Visuals like diagrams, flowcharts, and a classic bullet-point list are great to communicate your content both succinctly and aesthetically.
If a piece of content is a little more complex, you could even embed tutorial videos directly into your workbook!

Step 2: Export your workbook as a PDF
Once you’re thrilled with your design and ready to share it with the world, it’s time to export it as a PDF.
Click the Share button in the top right corner, then click on Download.
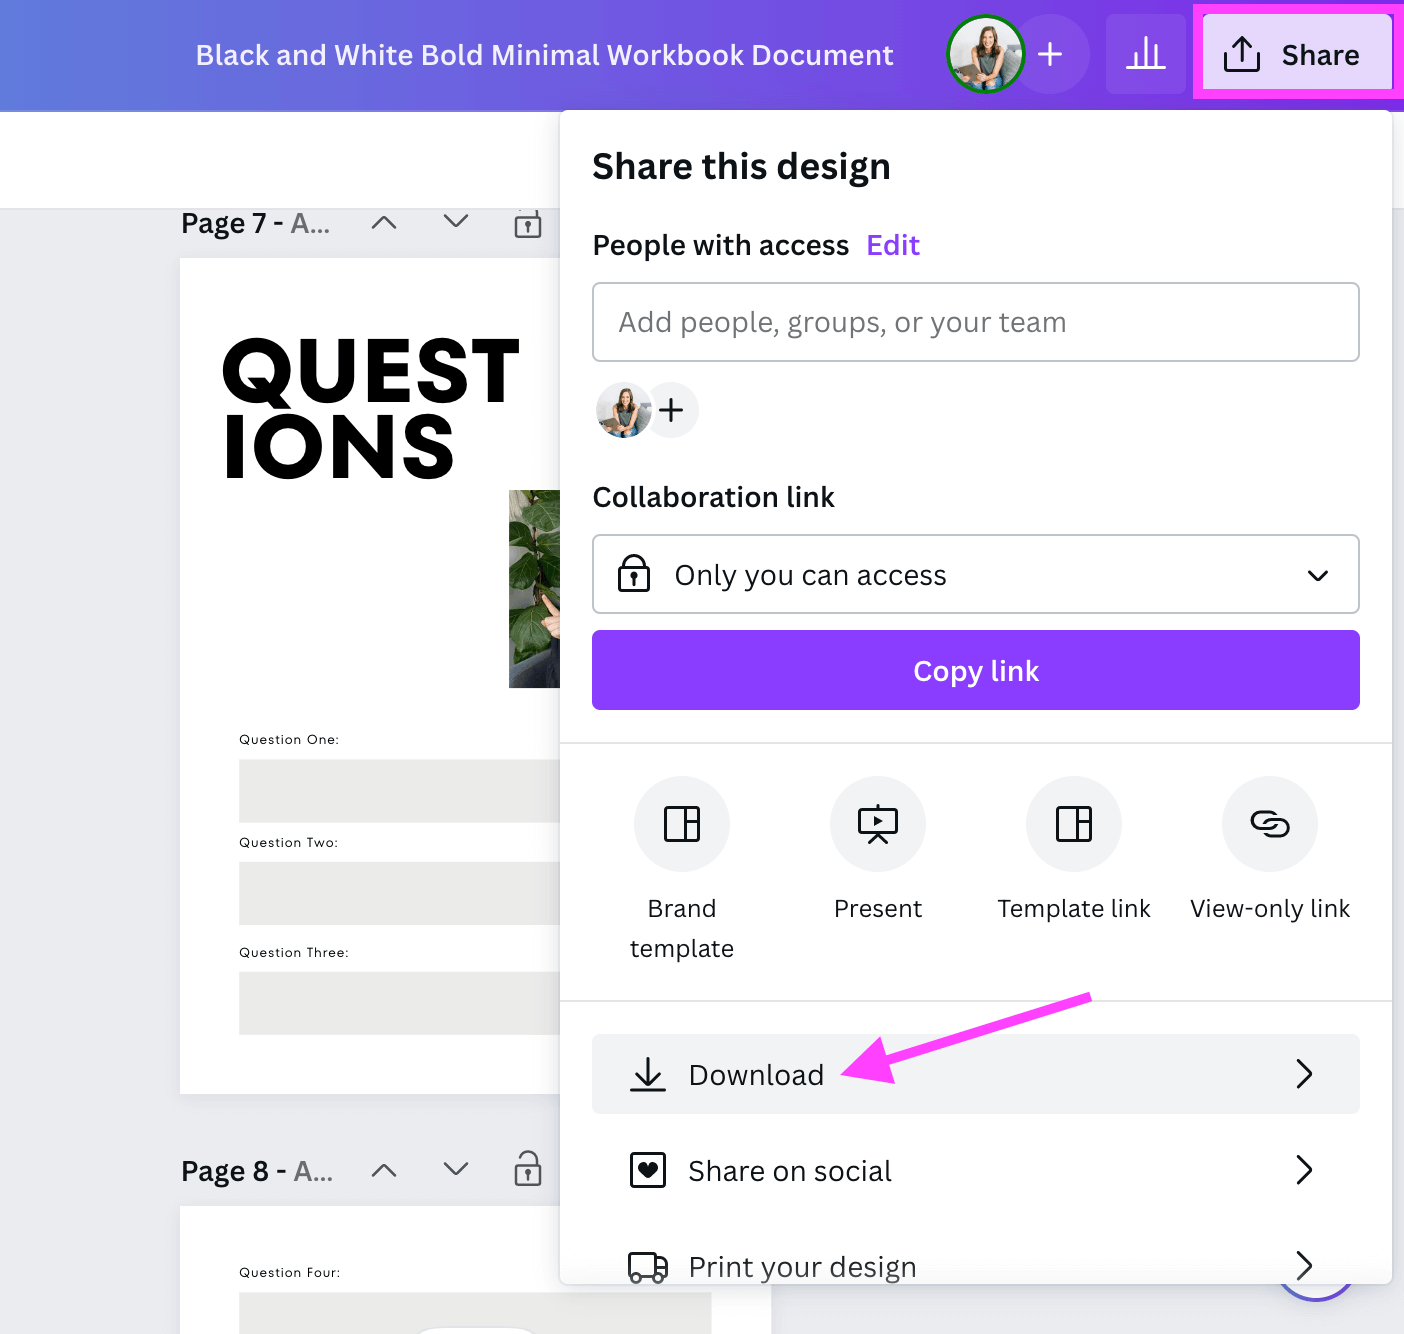
Change the file type to PDF Standard.

Then, click the bottom Download button, and voila! Your workbook will be automatically downloaded to your computer!

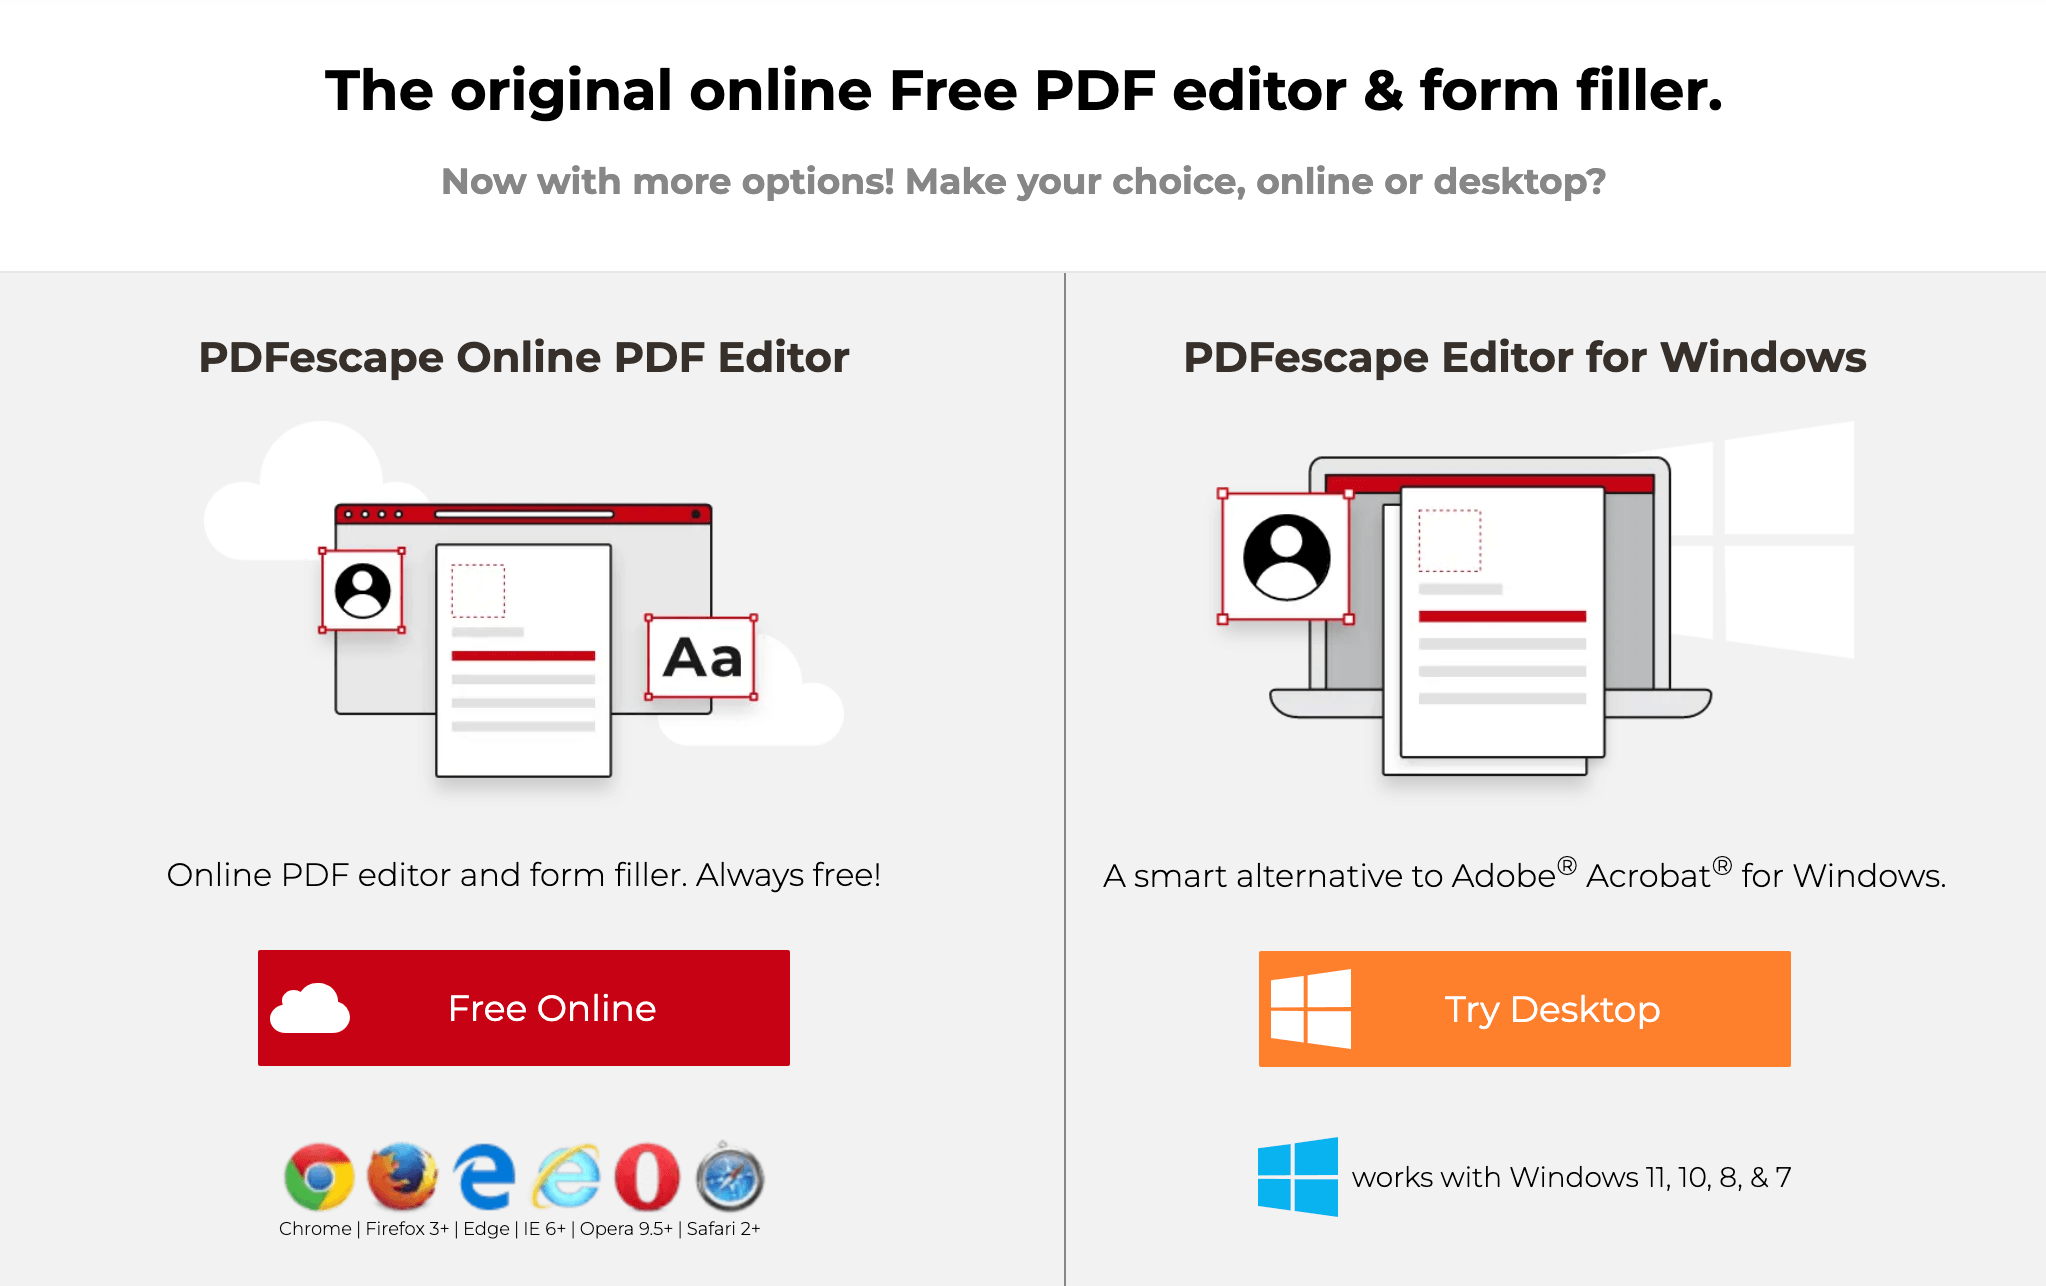
Step 3: Use PDFescape to make your workbook fillable
Next, it’s time to visit PDFescape. This handy, totally free tool is just what you need to quickly make your new workbook fillable!
Choose the right version for your computer and browser.
Upload your freshly downloaded workbook PDF.


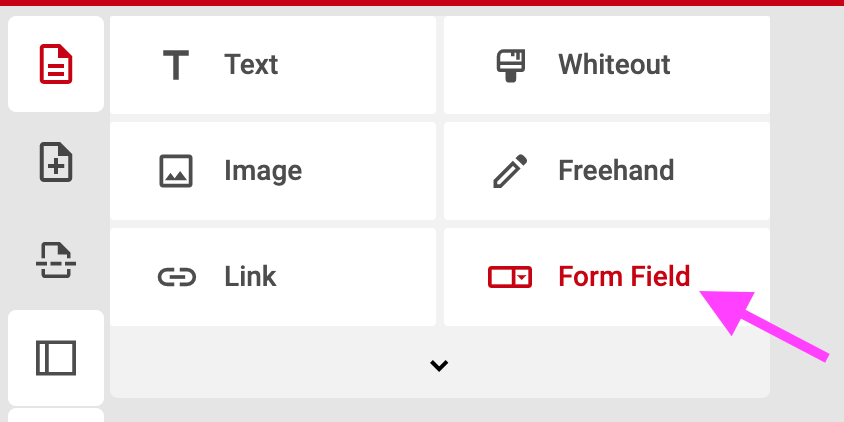
Once your workbook has successfully uploaded, click the first button in the left sidebar.

Select Form Field > Text.

Place a form field anywhere you need, then click on the top bar ("click here to disable") to exit the form field placement mode.

Now, click the pencil button in the header menu to edit your form fields!
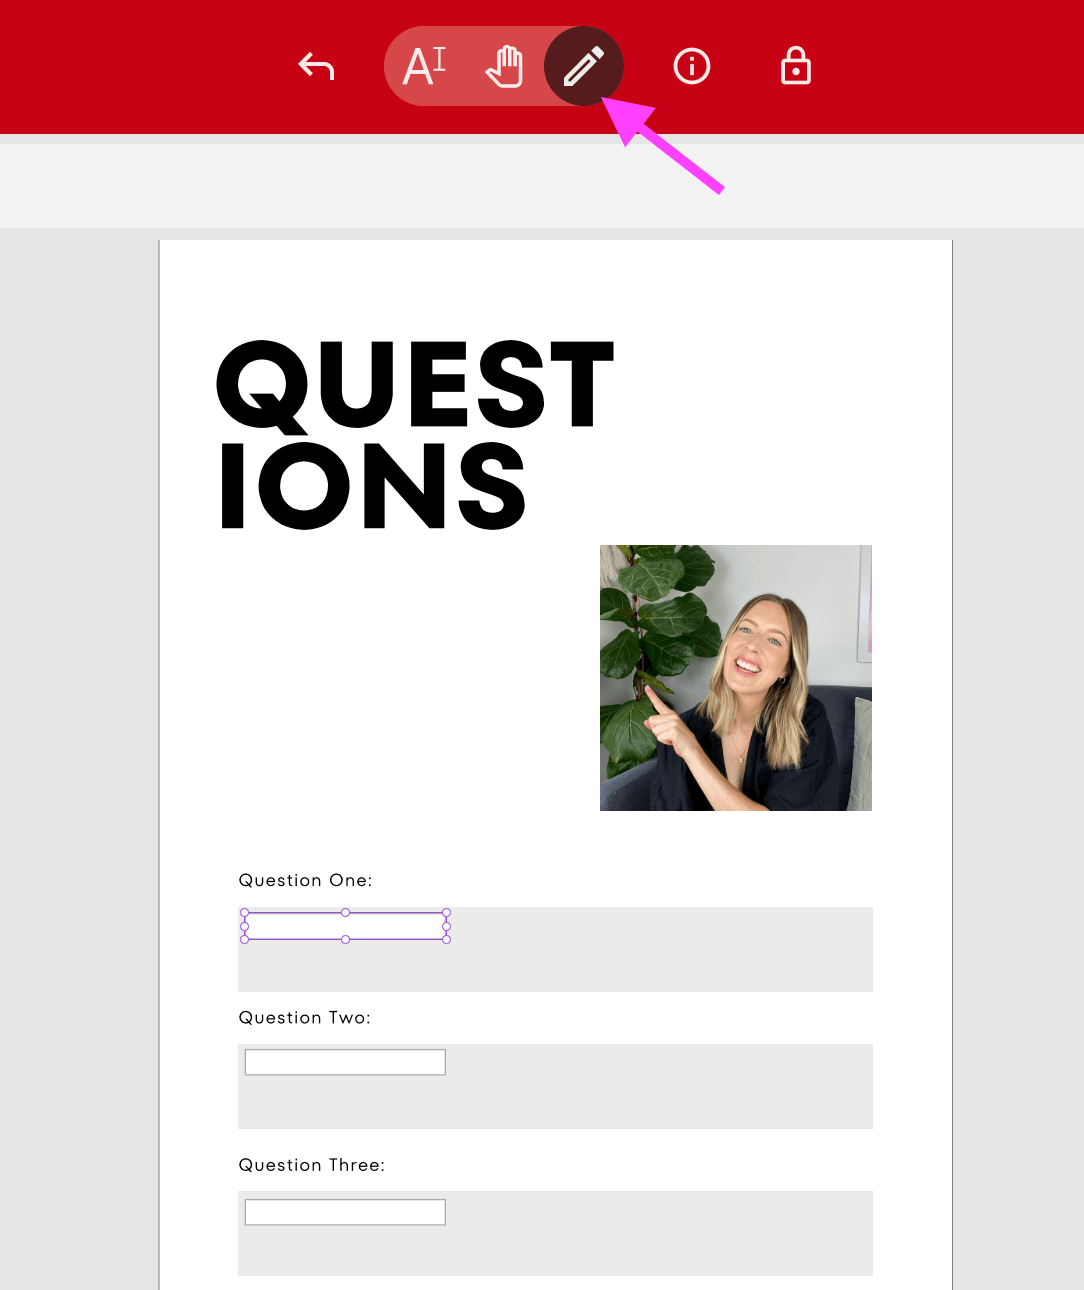
You will now be able to drag your form fields across the entire box.
Select a form field, then click on the wrench icon to access more settings.

Here, we recommend selecting the multi-line option, but you will also be able to select all kinds of other requirements, as well as add a max length, and set alignment.

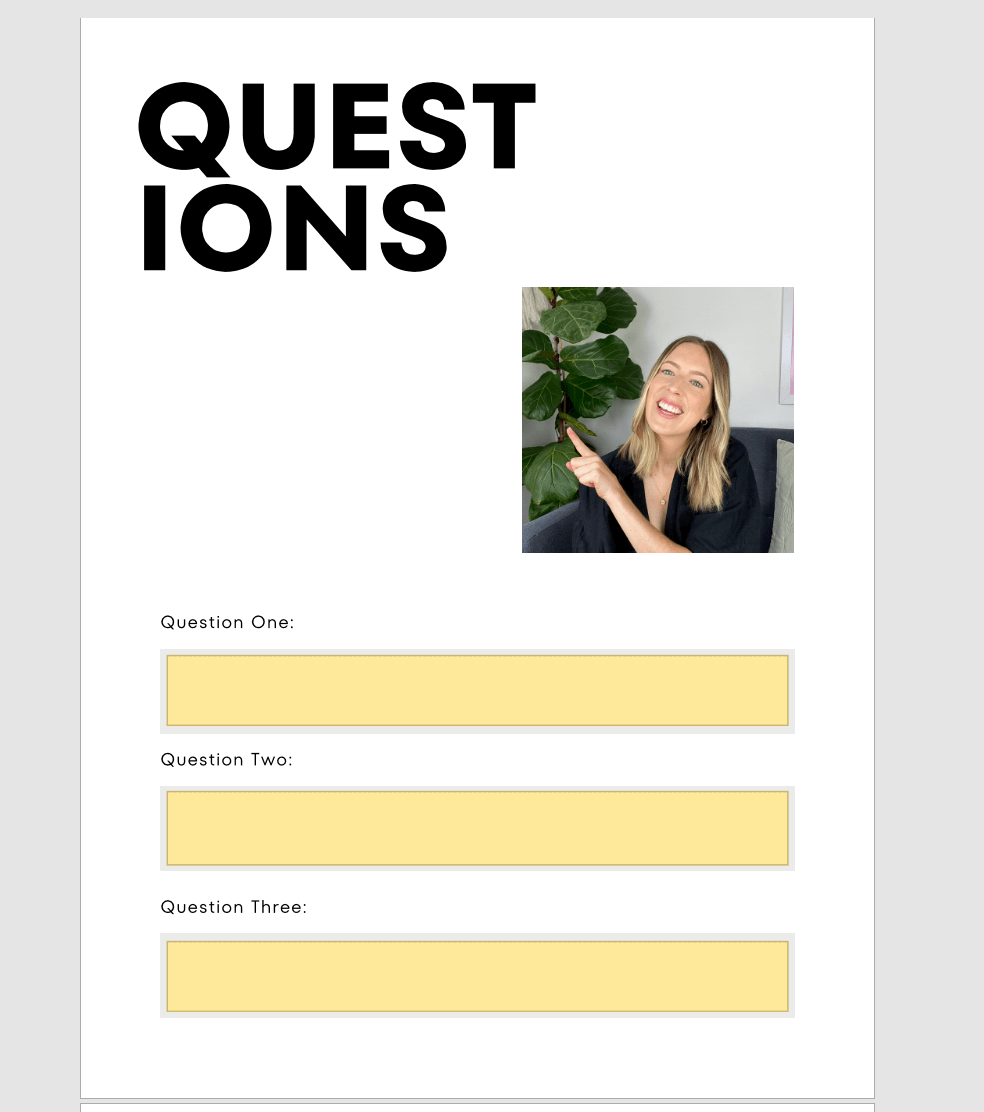
Once you're done, click OK. Then, click the download button in the left sidebar, and there you have it! A fillable pdf workbook, neatly packaged up for delivery in just a few clicks!

If you’d like to learn how to set your workbook up as a downloadable freebie, check out this tutorial.
If you want more handy Canva tips, check out the posts below 👇
How to create an animated intro for your Youtube videos in Canva (easy!)
How to create a scrolling computer mockup in Canva (easy!)
How to create GIF stickers for Instagram in Canva and Photoshop
How to create circle text in Canva
How to design kick-ass Pinterest graphics that are optimized to get clicks
If you liked this post, Pin it to Pinterest! 👇🏻
